This article is part of the Webcam Cool Project. You should check the project homepage first!
I recently set up a webcam pointing out of an upstairs window, uploading the view from outside to a page on this site every sixty seconds. This worked fine - apart from some light reflection off the glass and the kids knocking it over every now and again causing some strange images to appear for anyone looking in.
The camera I used was a Logitech Sphere, a V4L and V4L2 compatible camera that worked flawlessly with whatever Linux application I chucked at it. This camera was connected by it's three metre USB cable directly into the web server and produced an output as shown below.

As you can see, a nice clear image. A bit of reflection on the right hand side (which was at its worst at dusk) with the image captured at 320x240 pixels (although higher resolutions were available and it was later switched to 640x480).
There was always something nagging me about this image though. I wanted to get a better view with my camera - especially of the fields behind the houses. With this in mind, I decided a webcam on the roof of the house (attached to the TV aerial) was the way forward.
This caused two obvious problems however....
1. Where do I buy a weatherproof webcam (or how do I make one);
2. How do I connect a USB webcam to my web server - a cable run of about 15 metres (USB has a 5 metre limit without hubs or repeaters to extend the distance).
The first problem was solved quite easily. For a low cost weatherproof housing, a halogen floodlight is ideal. Mine cost less than a fiver from Homebase....
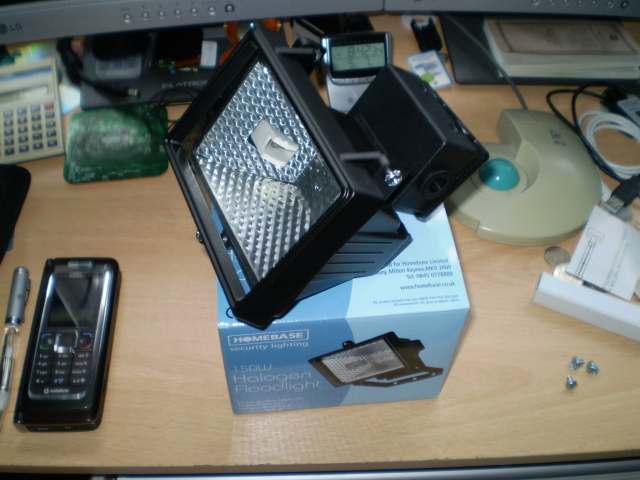
This is great - weatherproof aluminium housing, non diffused window, separate compartment for cable entry, low cost, supplied with mounting bracket and I get a spare bulb for my actual outdoor halogen floodlight!
Removal of a few screws was all it took to take out the reflector, bulb holder, wires and cable termination block. This left an empty housing ready to accept my webcam.
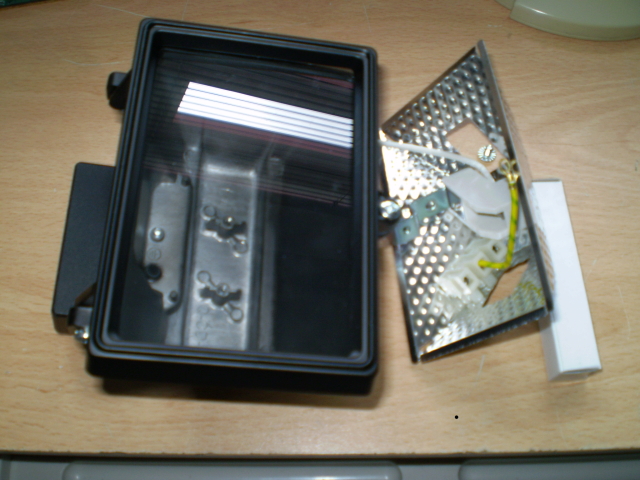
Now I had something to protect my webcam from the elements, I needed a way to connect it to the web server - a fifteen metre cable run away. Fortunately, the answer came in the form of these nifty USB Extenders...
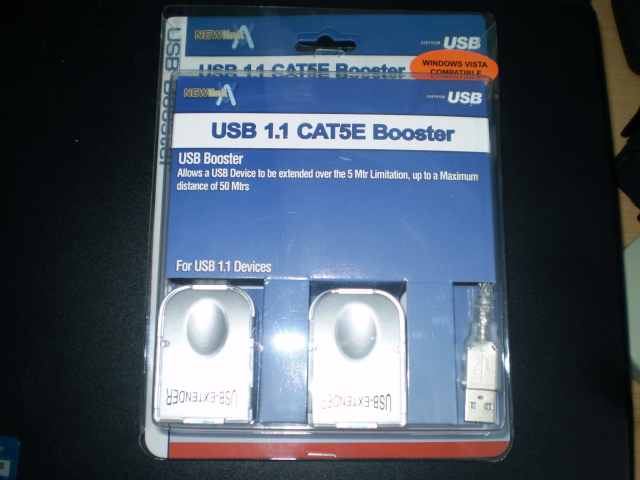
An interesting product. The host unit plugs into the computer USB port and has an RJ45 socket. Plug a CAT-5 cable into it and plug the other end of the CAT-5 cable into the remote unit. The remote unit has a USB socket to which you attach your USB device (the webcam). No external power is required as it's bus driven with the host unit providing power to the remote unit over the CAT-5 cable. No drivers are required so it's transparent to the computer/webcam. It claims to work over fifty metres. I'm not sure how it works, might be some kind of line driver or digital to analogue conversion. The manufacturers have ground off the top of the IC's used in the product so you can't see the chip type and work out what it's doing! As it turned out, the extenders weren't as passive as I hoped (see Post Installation Problems further down the page).
No matter. All I had to do now was fit the webcam and remote extender into the floodlight housing and attach the thing to my aerial.
Although pleased with the performance of the Quickcam Sphere, I decided not to use this for my outdoor project. The Sphere has motorised adjustment/face tracking making it quite a complicated webcam and I figured a lower cost fixed camera would work better so I decided to cannibalise a Logitech 5000 instead.
Ideally I would have kept the camera intact. One concern I have is that the cold will get to it in the winter however these webcams are warm when on because the decoder chip inside heats up. If kept in its case the camera will likely be protected from the cold as it would contain the heat from the decoder chip, however the webcam case was too big for my floodlight housing so I took the decision to remove the board from the case. I also removed the board from the USB Extender remote unit. The three metre USB cable from the webcam to the USB extender seemed to be overkill seeing as the two boards were about 15mm apart so I removed it and hard wired the output of the webcam to the input of the USB extender...
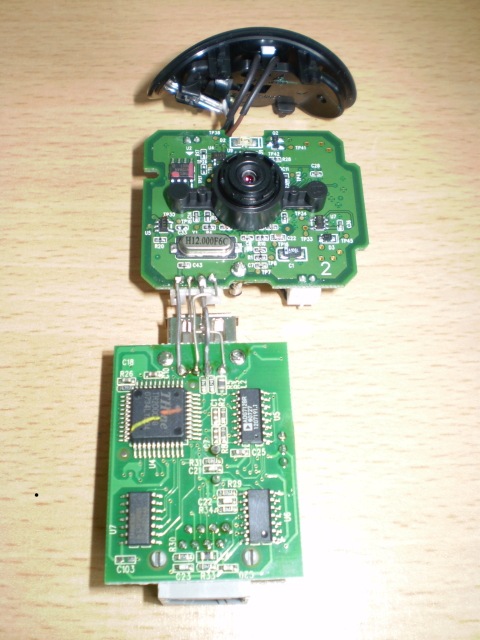
The top part is the microphone and upper housing of the webcam. I left this connected although I didn't need to as the camera works without it. The middle part is the webcam circuit board and the lower circuit board is the USB extender remote unit. This all fits into the floodlight housing as below.
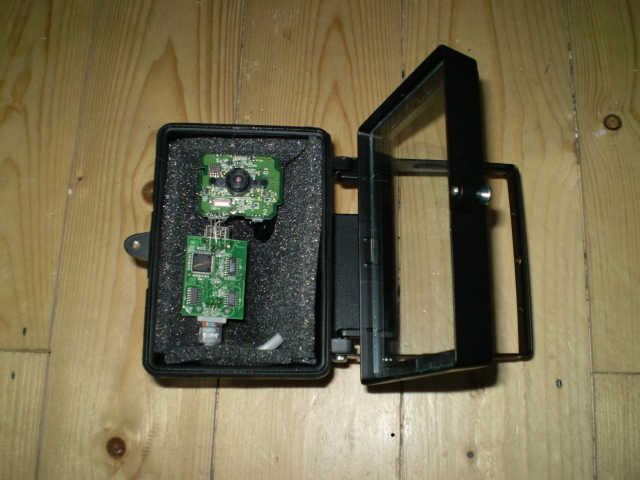
I've lined the aluminium housing with sponge to help protect the circuit boards from the winter freeze. I'm hoping the heat generated by the decoder chip on the back of the webcam board will be enough to keep the camera from getting too cold. The microphone unit is stowed behind the webcam board. At the bottom of the USB extender board is an RJ45 connector with a short cable that runs into the cable entry compartment of the floodlight. There's a bit of silicone sealant around the cable to keep any moisture that may get into one compartment out of the other.
The glass was also lined with sponge with a hole cut out for the camera...
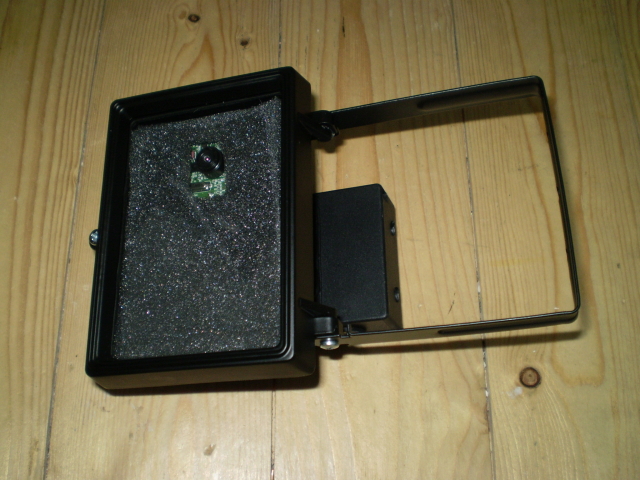
The cable from the camera compartment runs into the cable entry compartment where it is terminated onto an RJ45 socket...
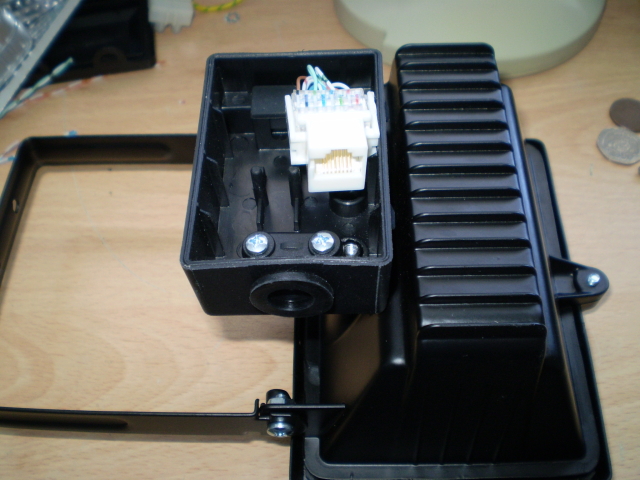
And that's it. The worst part was running the CAT-5 cable from the server on the ground floor up through the first floor, into the attic and out through the wall. Oh, and clambering around on the roof (I hate heights). I never thought I'd be crimping an RJ45 connector onto a cable while sitting on the apex of my roof!
Post installation problems.
One problem I found after installation was with the activity LED which lights up when the camera is on. At night it was reflecting off the glass resulting in a big green blob on my captured images. I had to get back onto the roof and slap some black tape over the LED to mask it.
Another problem was down to the USB extenders. However these work (line driver, D/A conversion - whatever), it seems the signal latency is too great for higher resolution images. I found capturing at 640x480 resulted in a lot of image corruption and I also found that the preferred YUYV palette wouldn't function at all forcing the use of the MJPEG palette. These issues didn't occur if the camera was connected directly to the computer via USB and the problem remained even when a short CAT-5 cable of just a couple of metres was placed between the extenders showing it's not it's not the cable distance that's the problem but rather the way the extenders encode/decode the information over the CAT-5 link. In the end I had to capture at a resolution of 320x240 which is then blown up to 640x480 by the web browser resulting in a large but slightly blocky image.
The final problem was the change of webcam. The Quickcam Sphere I originally used with camE was changed out for the Logitech Quickcam Pro 5000 which isn't V4L compatible. This meant camE couldn't find a compatible device resulting in me having to switch my capture application to fswebcam. See the links at the bottom of the page for more information on fswebcam.
Relating to the change of camera was the fact that the SPCA5xx chipset used in the Quickcam Pro 5000 is known to be a bit iffy in Linux. Every now and again the camera locks right up and only unplugging it from the USB port cures it. Sometimes it will run for a week without problems, sometimes it will lock up twice in one day. If you find the image frozen then it's likely the camera has locked rather than the fswebcam daemon being stopped. An electromechanical solution was put into place a month after installation to ensure that if the camera does freeze up, it will be electrically reset within two hours.
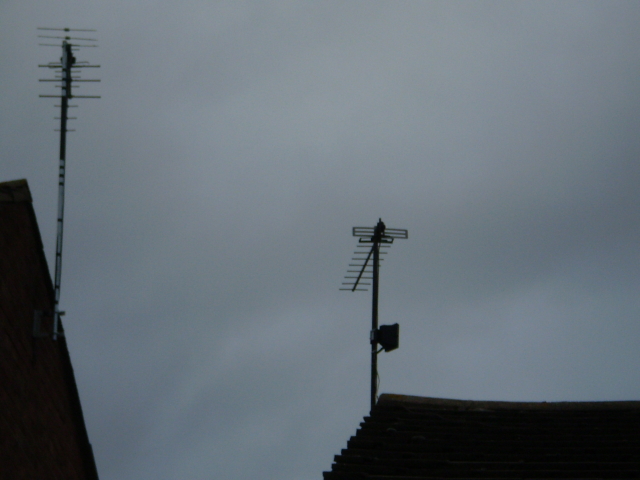
Anyway, here it finally is, under the grey skies of Leamington Spa attached to the television aerial with jubilee clips...
... and here's what it's looking at right now!.
Related articles on this site:
Webcam Project homepage
Using a Video4Linux (V4L) compliant webcam with camE
Using a Video4Linux2 (V4L2) compliant webcam with fswebcam
Refreshing a webcam image with Java and using a webcam with Joomla 1.5
The view from my corner of Leamington Spa via my TV aerial mounted webcam!
The electro-mechanical USB reset circuit
One year on...
