We decided to ditch our ageing but thoroughly trustworthy VW Polo this month after eight years of happy motoring. The little red fella is now starting a new life as the first car for a 28 year old archaeologist who seemed like a very nice lady. We needed something bigger for our camping holidays and trips to the DIY stores so we nipped over to Honest Johns Motors and parted with a wad of cash for a 'new' used set of wheels.
And here she is, a gold Volvo V40 Estate (Diesel) - or the bling PussyWagon as she shall be known from here on. It cost twice as much as we were expecting but as Honest John himself pointed out, this isn't just one car - it's actually two cars welded together with the back half a whole year newer than it's licence plate suggests, and it also comes with a two tone paint job as it's a different colour on the inside of the boot and doors to the gold on the outside.
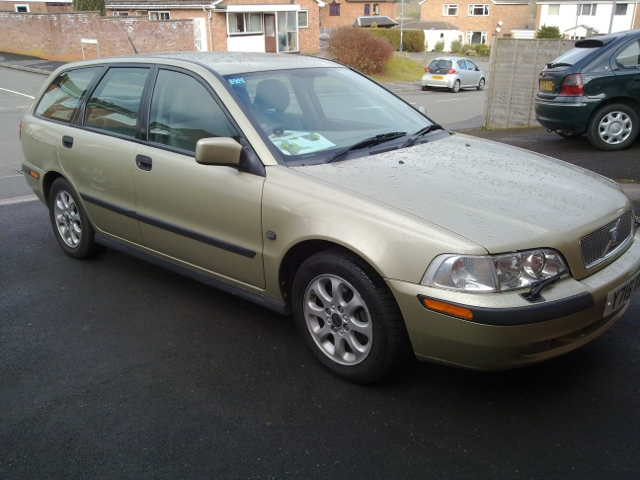
Volvo. Guaranteed to drop a ladies knickers quicker than Vaseline on the legs.
Annnnnnyhow, I have a rather nice little Garmin sat-nav. It's a bit old now and lacks some clever features but it works better than any of the newer fancier sat-nav unit's I've gotten my paws on. It's one of those things that sticks to the windscreen with a suction cup, only it has a habit of dropping off and bouncing into the footwell just as I approach tricky junctions. To get around this I use silicone sealant to glue the bugger onto the glass. To power the Garmin I use a connector that fits into the cigarette lighter which, although not a problem previously, is awkward on the Pussywagon as the lighter socket is in the centre console in front of the gear stick and behind a flap. To use the socket I'd have to keep the flap open and have a wire trailing around the gear stick and dashboard which would be rather messy looking and would get in my way as I speed along the motorway at 120mph trying to drink my coffee.
Another problem is that I only have one Garmin power supply and I'd rather leave that in the wife's Golf which also has a suction cup siliconed onto the windscreen. I'm happy to transport the sat-nav itself between vehicles but I'm far too lazy to shift all the paraphernalia that goes with it..... which got me thinking..... If only cars had a USB socket fitted. The Garmin can be powered by USB and most modern gadgets from MP3 players to mobile phones can charge from such a socket.
Why, when you look at it like that, I'd be crazy not to fit a USB socket into my dashboard to power my toys when on the move and what's more, all the bits I need are readily available in my junk box!
In fact, all I need is a USB socket, a fuse, a switch and a good old 7805 voltage regulator which turns the nasty 12-14V output of my car battery/alternator into a lovely 5V at up to 1A which is just what my thirsty gadgets need.
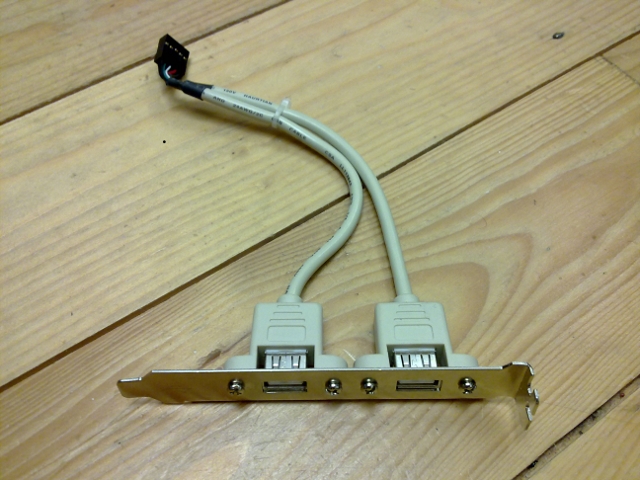
The USB socket is the hardest thing to get hold of and I'm using one from an old computer backplane left over from my PC building days.
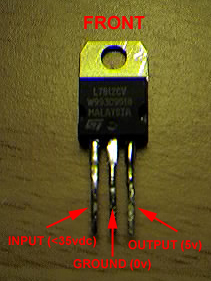
I mentioned the voltage regulator and here one is. On mine, an input of about 7-35V DC will produce a nice flat 5V output with a current of up to 1A which is twice what a normal computer USB socket will output. You'll notice the heatsink hole and I will be bolting a heatsink to my regulator as the thing will warm up under a load over about 200mA. My sat-nav and mobile phone will be slurping more than this and I don't want the regulator to burn out, especially when the car's interior is hot in the summer months.
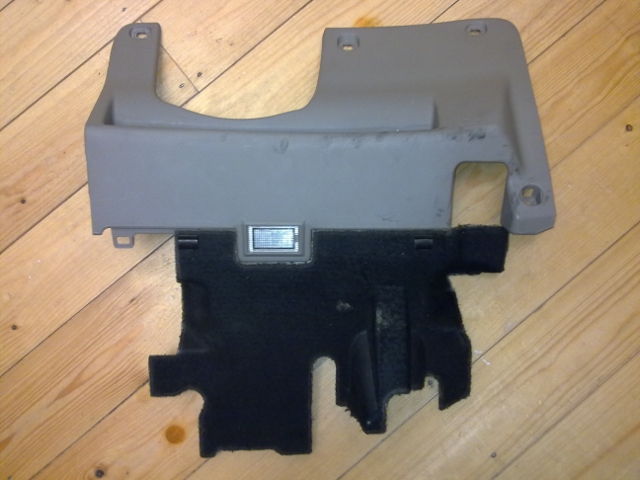
I'm locating the socket near the drivers footwell and I've removed the trim from this area. Here it is, the cutout for the steering column towards the left and the footwell courtesy light visible. The blank part of the panel on the right has plenty of space to house the socket and there is enough clearance behind this part of the panel for the circuit board. I've already used my Voltmeter to find a 12V and Ground (0V) line amongst the cabling behind this panel and I'll be splicing into these supply lines. I didn't want to use the 'accessory' power line (i.e. powered only when the key is turned) as I may want to charge devices when the car is unattended. I will be fitting a power switch however so I have the option of deactivating the socket and anything hanging off it at any time.
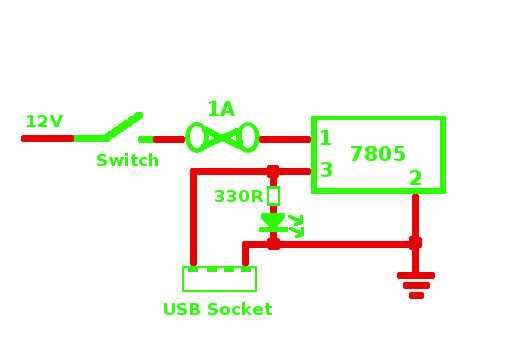
I'm going to knock up the circuit as below. I could have simplified it by leaving out the power switch and having the thing run from the accessory power line or simply left it permanently powered. I've also included a LED to indicate when the socket is live and a 330 Ohm resistor prevents the LED from being fried by the 5V regulator output. A 1A automotive fuse should prevent it from blowing up should something untoward be shoved into the USB socket and the socket itself is wired so that only the power lines are connected leaving the two data pins in the centre unused. One last note of caution should you build something similar - ensure you get the USB socket polarity correct to avoid damaging any gadgets you hook up to it!
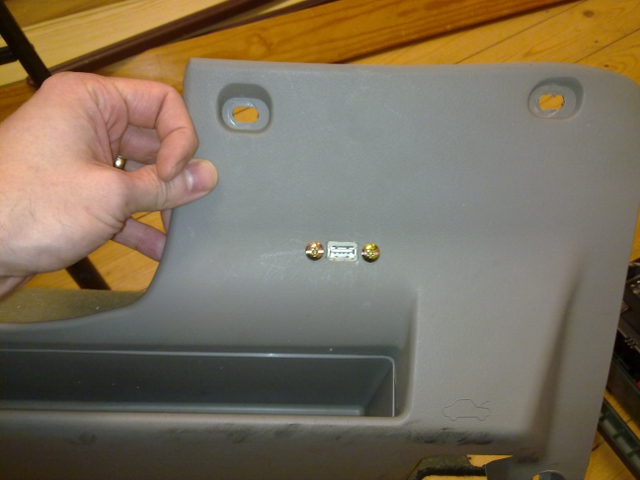
I used my craftsman's skills (!) and a Dremel to cut a rectangular hole into the trim. Two beefy self tapping screws have eaten into the plastic of the USB connector behind the trim to ensure it will stay firmly in place. When fitted to the car, the socket will be angled downwards which should help prevent any debris getting inside it.
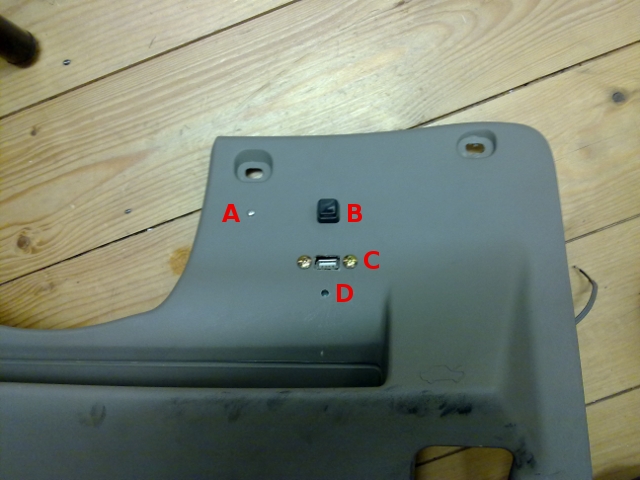
Here all the components have been mounted. We have a bolt (A) which holds the heatsink and circuit board in place on the other side of the trim, the power switch (B), a latching pushbutton type, the USB socket itself (C) and finally the LED power indicator (D).
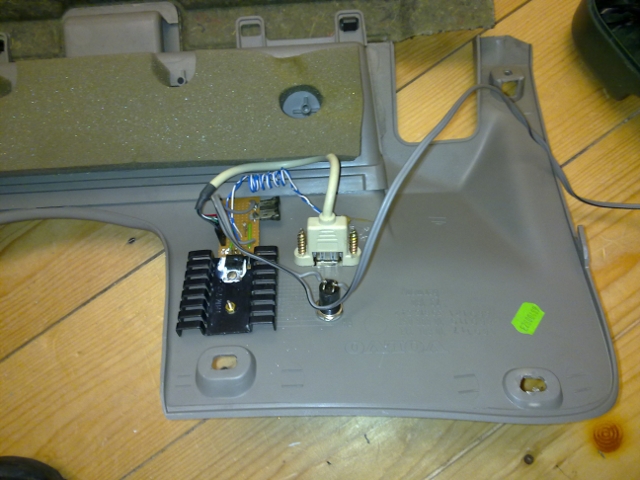
And here's how thing looks from behind. As mentioned before, that nice big heatsink is bolted on to the trim but it is also offset to prevent it damaging the plastic if it heats up too much. As the heatsink is bolted to the regulator and the regulator is soldered to the circuit board, the whole thing is held securely in place. The blue/white wires attach to a green LED which illuminates when the circuit is powered on. The circuit board is pretty small and serves to hold the regulator, fuse, LED resistor and to provide the wiring interconnections.
The last job was to splice it into the supply wires and bolt the trim back into place. I ran a USB cable from my sat-nav through an existing hole in the side of the dashboard and down into the footwell. Here it can be stowed at the side of the footwell or plugged into the socket. My sat-nav is now powered with the minimum of wiring on show and I can also plug in other devices and plop 'em on the shelf built into the above trim to keep them out of sight when unattended or out of the way when I'm driving.
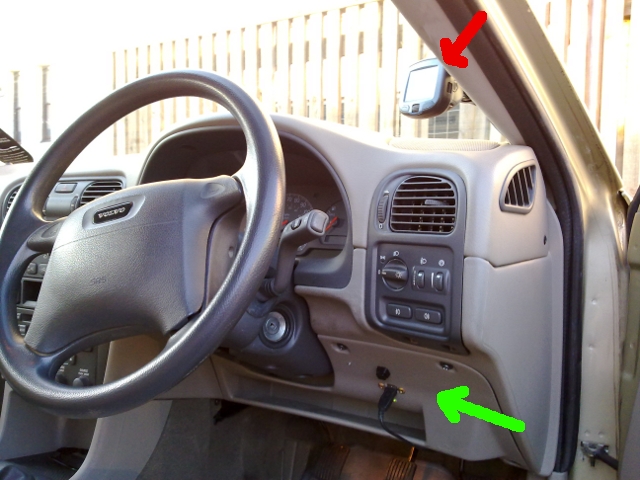
Fitted in place, the Garmin sat-nav (red) and the USB port (green) - and no cables trailing over the dashboard!
One design flaw was the location of the power LED which, for some reason, I placed below the socket so I can't actually see the thing when a cable is plugged in. I should have placed above the power button. *sigh*
One last curious point, although powering the sat-nav and the Palm Pre I was recently playing with, it doesn't play with my Nokia N97 even though the Nokia can supposedly charge from a computer's USB port. I don't see how the N97 knows any different unless Nokia have done something sneaky with the data lines(??) A quick Google shows I'm not the only one having trouble charging an N97 from USB so it looks like I'll have to continue boosting the battery of that smegger from the cigarette lighter socket.
