Unlike most articles on this site, this project isn't about some dodgy electronic dongle I've knocked up, nor is it about computing. Instead I document for the ages the setting up of my new aquarium as an ongoing article that I will expand over time.... well, until the thing is going or I'm bored of talking about it.
After two years of running a fifty litre aquarium I had hoicked from the local dump, a living room revamp has opened space for something larger. So with childish excitement and a fist full of legal tender displaying the queens head, I started scouring the interweb for some five star accommodation for my fishy friends.
One corner of my super new living room has an angled wall holding the LCD TV so a corner tank was the ideal choice for the opposite side of the room. Unfortunately there aren't a lot of options when it comes to corner aquariums (or most other aquariums for that matter), the main candidates being 190 or 350 litres in any colour - so long as you like beech, oak or black.
Actually, that isn't quite true as the Fluval Venezia 190, one of the two tanks I was considering, has reversible door panels allowing some extra customisation of colour combination by offering a Titanium or 'Zebrano' look which is quite exciting. I do think there is a niche out there though and if someone could make funky looking but affordable tanks at this sort of size then they'd be onto a winner. The Fluval Edge and Biorb tanks show that something stylish and different can be achieved at the smaller end of the spectrum.
In the end I only had enough pound notes to cover either a Fluval Venezia 190 or a Juwel Trigon 190. Both are very similar and I found myself leaning towards the Fluval because it had a number of features I liked such as the filter being housed in the cabinet, built in light timer, reversible doors and colours that better fitted in with my new living room scheme. It was also £75 cheaper than the Juwel which would mean some left over lolly for blowing on furnishing the tank.
Unfortunately, although there seemed to be no competition I had nagging doubts about buying the Fluval and was reluctant to part with my hard earned cash. A bit of Googling had found people bemoaning their Fluval because of leaks, poor quality cabinet construction and difficulty in getting spare parts. Reluctant to take the Internet's word for it I decided to get up off my arse and visit three aquatic stores in the area to take a closer look and seek some expert opinion.
Rosedale Aquatics in Whitnash had the opinion that either Fluval or Juwel were fine choices and could source both. I noticed however that they had used the Juwel Trigon 190 for their own display tank which had been running for four years according to the proprietor, without any problems.
Coventry Aquatics didn't rate the Fluval and said they had stopped stocking them because of too many design changes and difficulty in sourcing parts. They stocked the Juwel tanks and were £25 cheaper than Rosedale.
Pets at Home is a big chain store and not necessarily an aquatic specialist however the chap in the Leamington branch seemed to know his sausages. They were selling Fluval tanks and although they didn't have the Venezia corner tank I wanted they did have the 180 litre non-cornered version. Viewing it up close however I felt it looked 'cheaper' than the Juwel tanks I'd seen in the other shops and to be fair to Fluval that may just be down to some half-arsedness during assembly by the Pets at Home staff as some bits were definitely missing. The helpful sales chappie talked them up and their price was £75 lower than the cheapest Juwel tank I'd found (cheaper than on the Internet even). When pressed though, the Pets at Home geezer did admit he had a Juwel tank in his own house and for me that was the last nail in the Fluval coffin.
Although I'd only heard a few negative opinions about the Fluval tanks, I'd not heard anything bad about Juwel. I decided it was better to spend the extra rather than risk saving £75 now only to find problems occurring further down the line. The order was placed with Coventry Aquatics on Monday and I was collecting the tank on Friday. The tank can be ordered on its own or without the stand but I needed both. The stand comes flat-packed and the two boxes fitted into the back on my VW Golf with the back seats folded down.
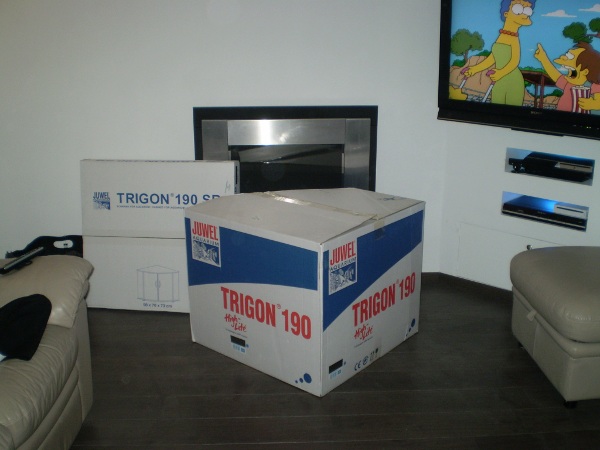
16/10/09 - it's out of the car....
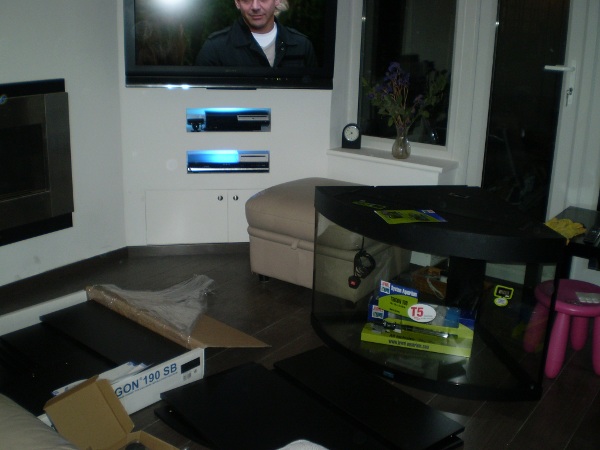
...and out of the box!
Cabinet construction.
The cabinet is made of chipboard coated in a plastic finish to resist water. Construction was pretty straight forward and took just over an hour although that was with the kids 'helping'. The thing is held together with bolts that self tap into pre-drilled holes and only an allen-key and screwdriver are required. I remembered halfway through that I had some hex bits for my Bosch Uneo which speeded up assembly. I originally fitted the middle support the wrong way around which left the shelf supports out of place and while easily corrected it would be nice if the instructions gave you a heads up on that. My only real criticism of the stand is that the shelf supports are a bit loose as are the shelves that rest upon them. That was easily sorted with some Unibond No More Nails but if a small tube of wood glue had been included it wouldn't have gone amiss.
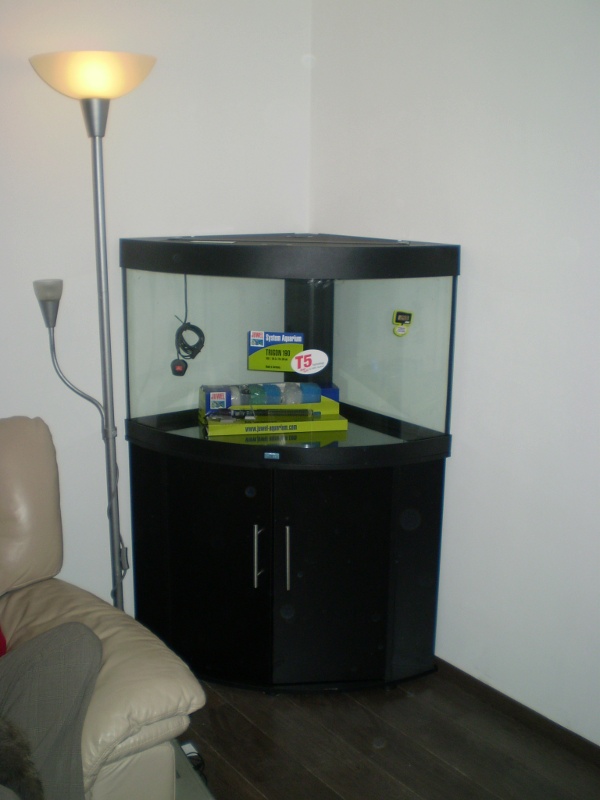
The tank and cabinet look smart and feel well made. The Germans like their fishkeeping and you can count on them to bolt together a quality aquarium like they bolt together their cars.
Included equipment.
These days the Juwel tanks (and Fluval for that matter) are supplied with T5 lighting, an upgrade to the T8 lights of older tanks offering higher brightness, lower energy consumption and deeper penetration of light into the water. My Trigon 190 was supplied with two florescent tubes, a 'Day' tube providing a blue hue toward the front of the tank for showing off the colours of the fish and a 'Nature' tube lighting the rear with a yellowish glow that the plants should like. I chose to buy the optional reflectors which are a bit steep at £7.50 each but they are supposed to improve the brightness of the lighting. It would be nice if these were included with the tank, after all they're just a bit of thin aluminium with a couple of plastic clips and probably only cost a few pence to manufacture. I couldn't tell you how much more effective they make the lights but the reflectors can be twisted to redirect the light somewhat and they eliminate glare when lifting the lid of the tank for feeding or maintenance work.
The filter box is sealed into the rear of the tank and filter pads are supplied to get you going. These slot into place using plastic cages which are a little awkward to slide in and out because they are so far back and catch on the lip of the tank. The heater and power head also fit within this box and one complaint regarding these items is that the mains cables are very short and don't even reach the floor. There's just about enough slack to get the plugs into the base of the cabinet which is where I'm going to be siting my mains distribution board for the tank electrics but I'd have no chance of plugging these into a wall outlet and leaving a drip loop unless the wall sockets were located directly behind my tank and a good distance up the wall.
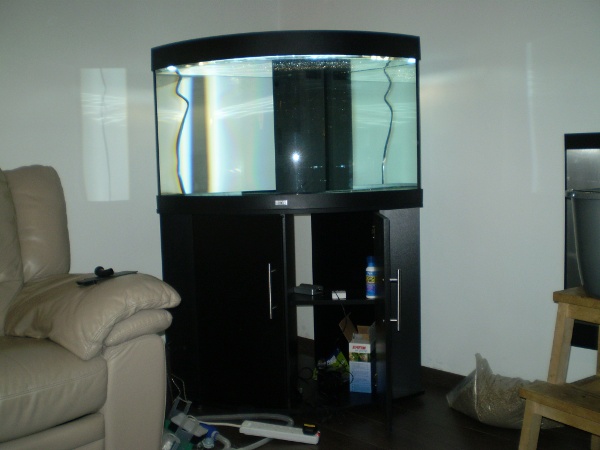
17/10/09, Filled with water to ensure there are no leaks from manufacturing/transit damage.
Customisation and installation.
Obviously a lot of planning is required in setting up an aquarium of this size because once it's full of water, it ain't gonna be moving anywhere! In my case the living room has just been remodelled and the last thing I want are cables and air hoses on show. Being a lighting chav however, I want some extra shiny lightyness and love 'em or hate 'em, I want a bubble flow or two.
Now I know bubble flows are noisy but I'm going to be fitting an extra pump to this tank, an Eheim 250, simply because I'll have one spare after decommissioning my old tank. To cut down on the noise, I will be locating the pump itself in the room next door as it is a little used store room. A mains feed and the two airlines run through holes drilled through the wall behind the tank. The pump will be on a timer eventually as I don't want it running 24/7 and although it helps to aerate the water it is more of a decorative feature than a necessity.
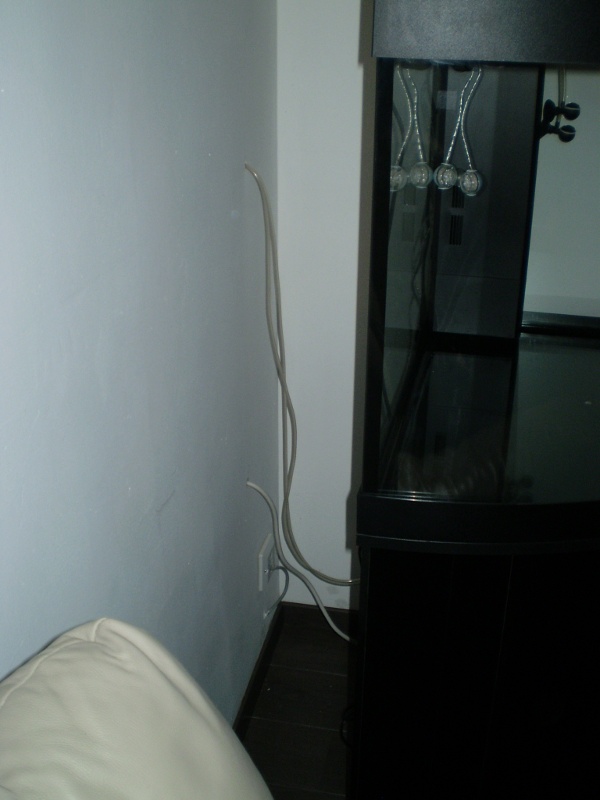
Showing the feeds drilled through to the next room. Two air lines (top) and a mains feed (bottom). Once the tank s pushed into place against the wall these feeds will not be visible.
To provide a backdrop for the tank I purchased two Juwel 'rock effect' backgrounds. These overpriced products are made out of styrofoam and provided in set sizes which means whatever tank you purchase you'll probably need more than one and will have to cut it to size. At about £40 a time I expected better and was annoyed at the amount of effort I had to go to in order to custom size these things for the Trigon tank. There are several problems with this product other than the shocking cost and the thickness of them is one issue. They're much chunkier than I expected and protrude a good few centimetres into the tank so you lose an awful lot of space. I'm planning to populate the tank with smaller fish but if you want to keep larger ones I would be wary of this product as several litres of water are displaced. Fitting the product is a pain and involves lots of fine cutting and shaving to get it to fit around the tank lip, seals and the filter power head outlet. There are sites on the net which show you how to make your own rock backgrounds using styrofoam and cement and I would consider doing this next time instead of purchasing these. For £80 (as I had to buy two) I expected something that was made to be fitted easily into my tank and that isn't what I got. That all said though, the end result is fairly impressive even if it did take all evening to get it installed!
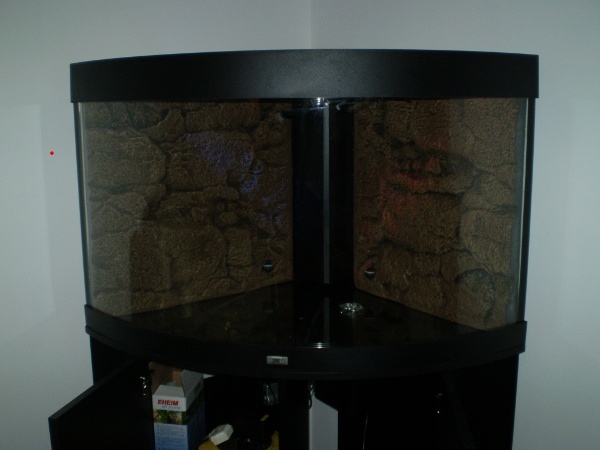
20/10/09 Rock backgrounds fitted.
One positive side of the backdrop thickness was that it allowed me to cut a channel in each so I could run the two bubble air hoses from the Eheim pump behind them to air stones mounted at the bottom. The air lines are therefore completely out of sight and although the stones protrude from the backgrounds, they'll be easily hidden by plants and ornaments.
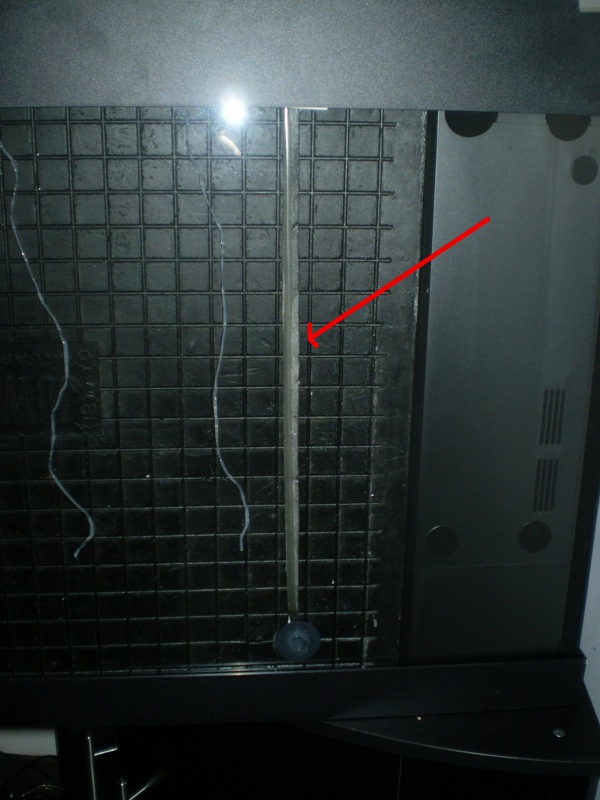
Rear of background against tank glass showing channel cut out for air hose.
In previous projects I made my own LED aquarium effect lighting, however for this tank I decided to buy some off the shelf LED spotlights because I didn't have the spare time to make some. I know its tacky but I wanted the option of lighting the bubble flows so I purchased one blue and one red 'spotlight' (I wanted blue and green but they only had red). These are USB powered so I fitted a spare USB hub into the cabinet for these things to be plugged into. Although submersible, I mounted them on the front inside edge of the tank above the waterline because I didn't want any wires on show inside the tank and the styrofoam backgrounds left no glass at the back of the tank for the suckers to stick to. I plan to run these off the same timer as the bubble pump so they won't be running 24/7 but will be on for decoration only at a particular time of day.
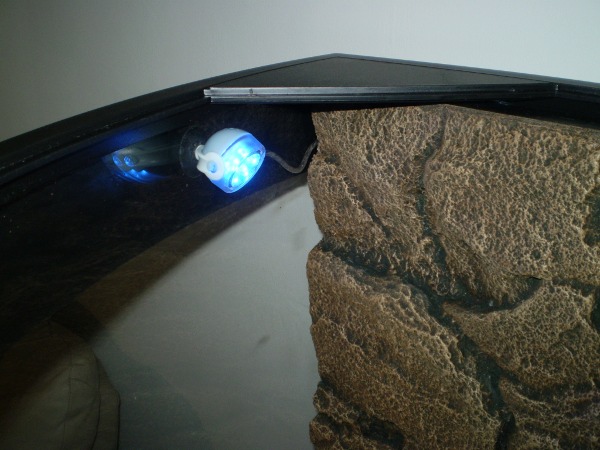
LED spotlight. One of two that are fitted with the wiring running behind another channel
cut into the rear of the rock background.
One idea for an unusual lighting feature came to me while I was setting up the tank. I figured I could use a hole saw to drill a hole through the top of the cabinet effectively placing a 'window' looking up into the tank. A piece of drainpipe was siliconed into place onto the glass base of the tank to keep the window clear of substrate and gravel and an 'AquaLED' light was fitted into the cabinet pointing up through this window at the base of the aquarium. The AquaLED is a LED based light which has two motors that rotate textured lenses through a magnifying glass. The end result is a projected 'water' effect similar to what you get when using halide lighting in a tank. Of course, all these LED effects are washed out when the main tank lighting is on but when set on a timer to provide some night time lighting it can look rather effective.
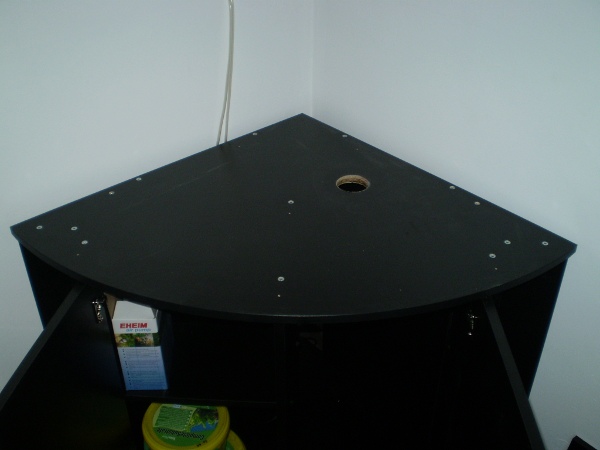
Hole cut into cabinet to allow a light to shine up into the tank from the base.
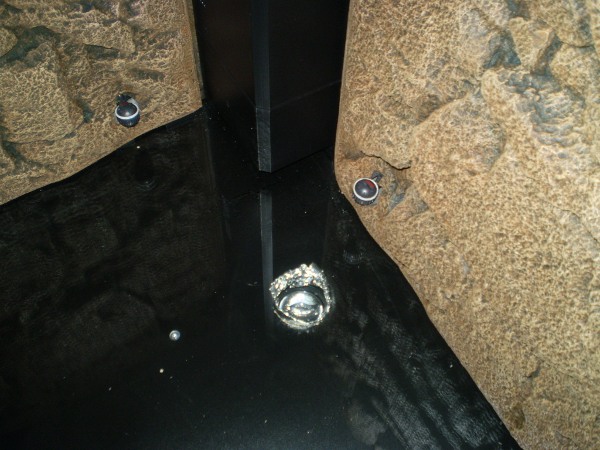
direct the light upwards. Also visible in this picture are the two air stones protruding from the rock backgrounds.
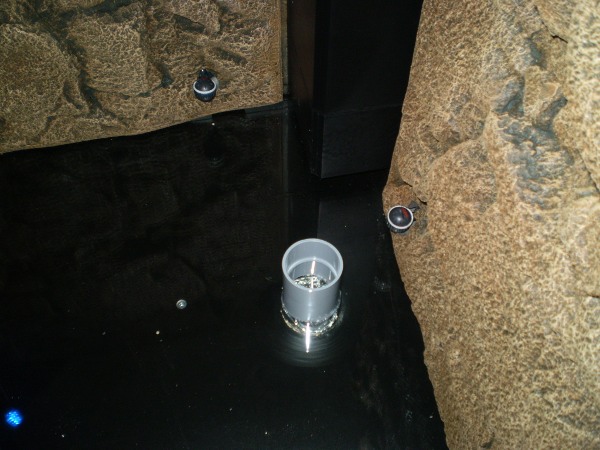
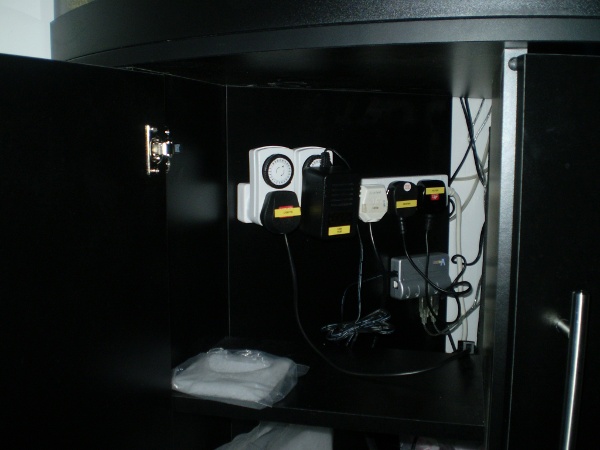
Mains distribution board fitted within the cabinet. Also visible is the USB hub to power the LED spotlights. Two plug-in timers control the tank lighting, LED spotlights and, eventually, the secondary Eheim air pump.
Aquascaping, filling and planting.
For the substrate I'm using a nice thick layer of TetraPlant Complete Substrate. A 2.8kg and 5.8kg tub was required to sufficiently cover the base of the tank and it should be a good fertilizer for the plants. The top layer is fine gravel washed beforehand and topped off in places with aquarium sand and white gravel. Two artificial plants were fitted, a grassy number which I'll probably eventually remove in favour of some real plants and a large 'Heathers Dream' on suckers which I have siliconed on to the rear filter box to help conceal it. I know, I know, why fit fake plants when I've gone to the effort of installing a fertilized substrate?? I just don't want to over plant the tank at first and I figure I can remove the plastic ones further down the line to make way for the real ones to grow or new greenery to be added. Some rocks from the old tank were also placed within along with a bark ornament used to conceal the drainpipe light mentioned above.
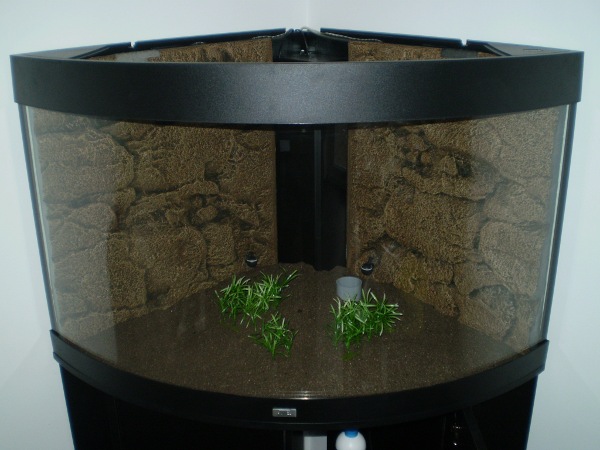
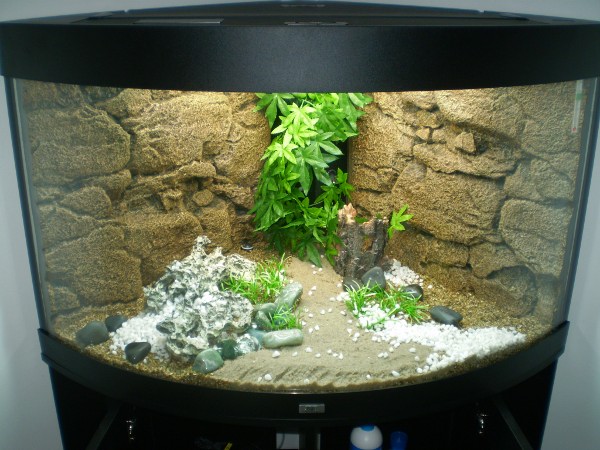
It wasn't until six days after construction that I finally filled it with water as I needed to ensure the silicon I had used to affix the backgrounds and suction cups had dried and I wanted to ensure all fixtures and fittings were in place because once filled, draining or moving the thing would be a major pain in the bum! Eventually, on 22nd October, it was ready. Water was dechlornated using API Stress Coat before being siphoned onto a saucer placed within the tank to prevent the gravel being disturbed by the flow. For the first 36 hours the water was cloudy but then the plants were introduced and the water cleared up soon thereafter. I've used a mixture of plants and intend to introduce more over time.
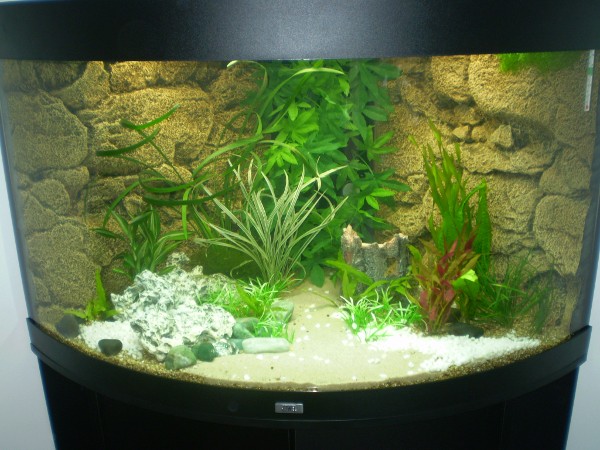
Fishless cycling.
When I set up my last aquarium I used a pair of Mollies to cycle the tank and build up the biological filter as I hadn't heard of fishless cycling. It would seem to be the general consensus amongst enthusiasts that fishless cycling is the more humane way to get a new tank going so I'm going to give it a go this time around.
Cycling a new tank is the process of building up the bacteria in the filter to cope with breaking down the waste products produced by the fish. The fish produce ammonia which is bad for them however the right bacteria will break the ammonia down into nitrite which is also harmful and then into nitrate which is less harmful and can be coped with by introducing live plants and performing regular water changes. A new tank won't have this bacteria so any fish that are introduced will suffer from the ammonia produced by their waste until the bacteria have grown and can cope with it. By that point however the fish may be dead or harmed by the ammonia and nitrite levels that were present in the water before enough bacteria showed up and started dining out on it.
Rather than risking harming any fishy fellows, I'm cycling the tank without any livestock. To kick start things I'm using some API Stress Zyme which is supposed to introduce some of the good bacteria to the water. I don't know how effective this stuff is but it seemed to get my Biorb going when I set that up a few months ago. I've also taken some gravel from my old, cycled, disease-free tank along with some of the plants and ornaments as all of this stuff will be covered in friendly bacterial troops to help get battle commenced. A water test at the start of the process shows ammonia, nitrite and nitrate to be at zero which is what I'd expect from my tap water.
Of course, these bacteria need something to live on and with no fish there is no waste for them to start processing so that they can grow, thrive and reach a point whereby the waste pollutants from the future tank inhabitants can be kept under control. To give the critters something to munch on you can either add food to the tank and wait for it to rot down (which gets messy) or add ammonia directly. I'm doing the latter and have purchased some ammonia from Homebase for £1.99. It's important to use a pure ammonia/water product and not something with added perfume, soap or other ingredients. My Homebase own-brand stuff is 9.5% ammonia, the rest is water so it should be ideal. It should be noted that products such as Stress Zyme also add to the ammonia level and this should be taken into consideration if applying it to a new tank.
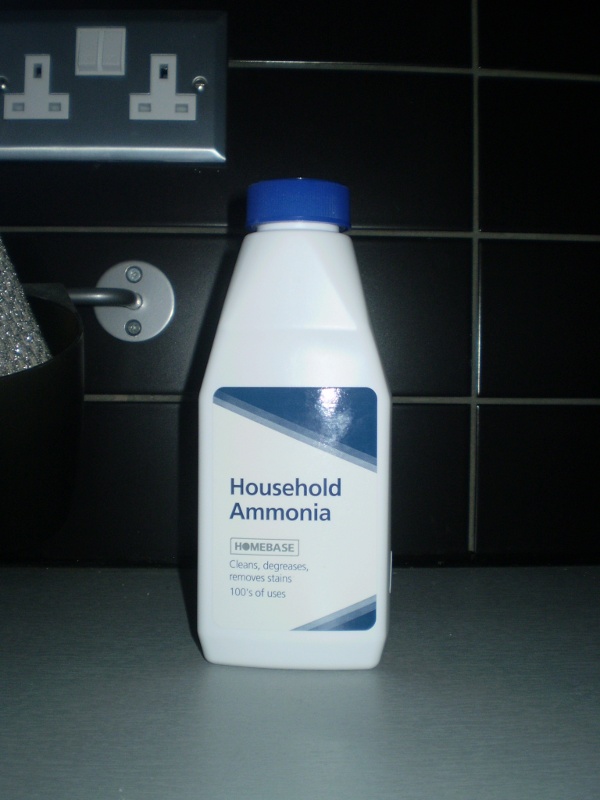
Homebase ammonia. Just the job for getting that cycle started!
Blurb over, the exciting time line of events unfolds below...
Thursday 22nd October: The tank has been filled with water. It's rather cloudy but that isn't a surprise. Heater and filter have been switched on.
Saturday 24th October: Live plants have been added. I didn't wash them so, like the last time I set up a tank, I suspect some snail eggs will be lurking on there. So long as there aren't too many of them I don't mind as I quite like the snails.
Sunday 25th October: The cloudy water has cleared right up thanks, I guess, to the plants.
Monday 26th October: Cycling process - day 1. After visiting five stores I eventually found some ammonia for sale. It's Homebase own brand ammonia and water (no soap or perfume ingredients). I used a calculation I found on a website to figure out how much ammonia I should add and got it completely wrong (or the calculator did). I completely nuked the tank with ammonia and overloaded any bacteria that were already starting to colonise the filter. Unfortunately it wasn't until day 3 that I realised the size of the mistake so on Wednesday a large water change got the ammonia reading back on to the chart. An alternative to using ammonia and making the same mistake is to put some shelled prawns into a porous bag and leave them to rot in the tank which doesn't sound too pleasant. I think if I were going to do this again I would add 0.5 to 1ml of ammonia per day until my tester showed a reading of 3 or 4ppm then leave it alone until the level starts to drop.
Thursday 29th October: Ammonia levels holding at 4ppm. A few snails have started to appear and some of them are surprisingly large. They have mottled shells and look quite attractive. As the Eheim pump is still in use on my old tank, I picked up a cheap no-brand air pump from Wilkinsons for £6 and hooked it up to one of the air stones as I hear aerating the water is good for the cycling process. Warmer water also helps so the heater is up to about 28-29C. Once cycled, I'll lower this to about 25C.
Monday 2nd November: I'm worried that the ammonia level is too high and should be dropped to help kick start the cycle. Another partial water change drops it to 3ppm. I'm going to stop second-guessing myself now and leave things to run their course. I'm testing the water every couple of days using a liquid ammonia test set. At this point I don't need accurate readings, just an indicator of whether my levels are dropping so to get some extra life out of my test kit I'm halving the measurement. I'm using a 2.5ml water sample instead of 5ml and applying half the drops required from the three test bottles. This might affect the accuracy of the test but it gives me an idea of what the ammonia is doing and I can revert to full testing once something interesting starts happening to the levels.
Wednesday 4th November: Brown algae has started appearing on the plant leaves. Until now the aquarium lights have been on a timer and are active about nine hours a day. I'm going to cut that down in the hope the algae will suffer before the plants do. The snails have increased in number but not excessively and I've seen them munching on the algae for me. I'm not too worried as I hear this brown stuff eventually flakes off and I know my shrimp will make short work of it when he is eventually introduced to the tank.
Saturday 7th November: Took a peek in the filter and noticed the 'weekly' filter wool was pretty filthy. It's been in there two weeks so was due for a change.
Sunday 8th November: Fished a scoop of gravel out of my existing cycled tank. This stuff is covered with bacterial good guys who can help get the new tank going and start munching on some of this ammonia.
Monday 9th November: Despite the initial snail infestation when setting up my first tank, once their numbers were under control I bought a spiky snail from my local fish shop because the lil' fella looked interesting and would help keep the algae down. Recently he's been looking a little moody in the old tank and I'm worried he hasn't got enough food now that the live plants have all been moved over to the new aquarium. Despite the ammonia, I decided to move him over to the new tank where there is plenty of algae to scoff.
Tuesday 10th November: The brown algae is flaking off and clearing up. On the way home from work I purchased a nitrite liquid tester ready for when the ammonia eventually starts dropping and a test tonight showed the level below 0.3mg/l (i.e. bugger all). I also picked up a sheet of filter wool that can be cut to size to replace the weekly filter pads. Doing this works out cheaper than buying the proper Juwel branded pre-cut pads and should entail fewer trips to the aquatic shop.
Thursday 12 November: It beginneth! How exciting! Ammonia down to 1.5ppm and nitrite over 0.3mg/l. The brown algae has disappeared off most plants and remains on some of the larger leaf varieties in a loose form. Snails all looking happy although I haven't seen Spiky today (he's hiding somewhere).
Friday 13th November: Ammonia still about 1.5ppm, nitrite risen to 0.8mg/l. Added 1ml of ammonia and retested a few hours later after it had circulated around the tank. Ammonia now somewhere slightly above 1.5ppm. Spiky snail spotted and he's looking happy. Also noticed a *lot* of tiny baby snails so may have a bit of an infestation starting. Will have to keep an eye on that.
Saturday 14th November: Another 1ml of ammonia added to ensure my growing bacteria have something to nosh on. Tested a few hours later and ammonia reading above 1.5ppm. Nitrite has gone up to 1.6mg/l so its moving along nicely.
Sunday 15th November: Added 2ml of ammonia. Upon testing later the reading was 3ppm with nitrite above 1.6mg/l. The remaining brown algae has disappeared overnight and all plants are now clear of it.
Monday 16th November: Ammonia back down to 1.5ppm showing the bacteria are chomping away happily and converting it to nitrite. The nitrite level is now at the top end of the chart with the scale of my liquid test kit indicating 3.3 to 33 mg/l as the maximum range. My dip 'n' read test strips which are less accurate than the liquid tests indicate Nitrite may be as high as 25-50mg/l but then it is quite hard to compare the pale pink indicator scales. Interestingly, for the first time the test strips are also indicating the presence of nitrate at 1mg/l which hopefully means I'm getting towards the end of stage 2 with the development of the nitrite to nitrate bacteria.
Tuesday 17th November: PAH! I have to go to London for a couple of days on business. Just as things are getting exciting and daily readings are required too! Dumped 2ml of ammonia into the tank on Tuesday morning before I left. Will check out how its doing when I return on Thursday.
Thursday 19th November: Jumped off the train and tested the water as soon as I got through the front door. Ammonia is zero! Nitrite has also dropped to just 0.3mg/l. Dosed the tank with 3ml of ammonia and a reading a couple of hours later showed 2-3ppm. The test strips show nitrate at about 10mg/l. We're near the end now and, hopefully, I can move my existing fish from the old tank to their new home this weekend.
Friday 20th November: Ammonia back at zero, nitrite still 0.3mg/l, nitrate at about 10mg/l. Clearly the ammonia is no longer a problem and the nitrite is being dealt with. Added 3ml of ammonia to keep things ticking over. I also removed the top panels of the tank and placed a silicone bead around the recessed handles as I found lifting these panels for feeding/maintenance caused some water to streak down the outside of the panel from the handle leaving unsightly watermarks.
Saturday 21st November: With cycling now about complete I've put some time into preparing my tank for its residents. I've dropped the heater from 28 degrees to 25/26, replaced the weekly filter, removed some dead vegetation and changed 50L of water. I'll leave it to settle for 24 hours and then it should be ready to accept the fish from the old tank. I haven't kept up the stock in the old tank for some time and inhabitants consist of just three Black Neons, three Glowlight Tetra, one fighting fish and a shrimp. My last remaining Pristella Tetra died this morning so the poor bugger will never get to see the swish new pad. Never mind, barring any shock test results, tomorrow is the day!
Sunday 22nd November: The water still seems a little cloudy following yesterdays water change but as you can see from the photo below, both ammonia and nitrite are at zero levels and the cycle is complete exactly one month after the tank was first filled with water!
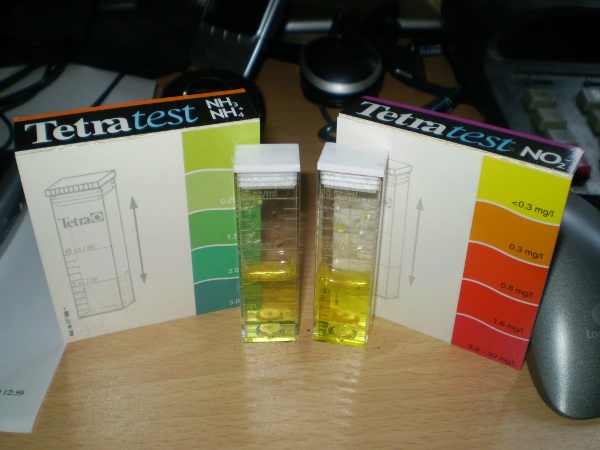
So there we go, not too bad, no fish exposed to nasty chemicals and an aquarium ready to handle a healthy amount of fish without needing a gradual build up. I'm not going to fully stock the tank immediately but I have now moved over my existing aqua-buddies and, despite a stinking hangover and the November rain, managed to get to Rosedale Aquatics before closing to pick up three Khuli Loach and twelve Neon Tetra (I'm a sucker for Neons). The wife wants a couple of Mollies but I'm going to wait a few days and keep testing the water to ensure the levels stay as they should.
Monday 23rd November: 24 hours after the fish were introduced to the tank, tests show zero ammonia and zero nitrite. Either these fish aren't producing any waste or the bacteria are doing their job. Let's be honest, we all know these fish are pissing for England in that water so it's three cheers for the microscopic good guys! The fish look happy... well, apart from the fighting fish who's always been a moody bugger and isn't showing his face much. The Khuli Loach have been sifting through the sand and gravel and *might* actually eat some of the tiny snails. Opinions seem to vary on whether they are snail eaters but I'm pretty sure it was the Khuli Loach I used to have in the old tank who cleared it of tiny snails leaving only the larger ones intact.
I'm an awful photographer at the best of times and taking pictures of moving fish seems damn near impossible however I've pasted in some snaps below.
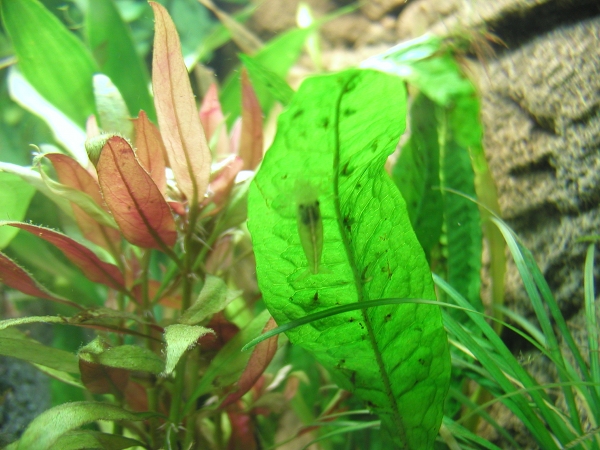
The shrimp, one of my favourite tank dwellers and a real character. Here he's hanging onto the underside of a java fern leaf.
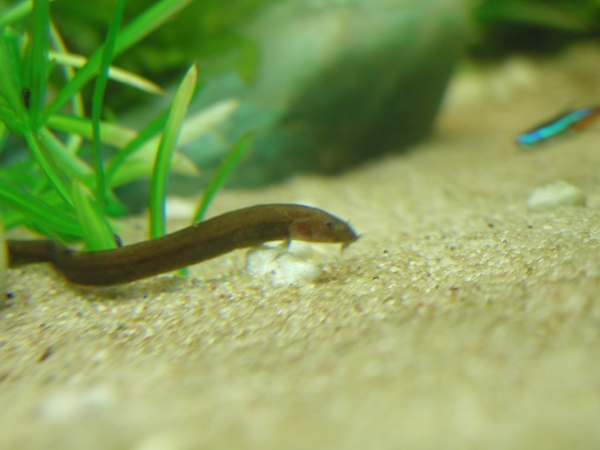
One of the Khuli Loach doing a spot of sand sifting.
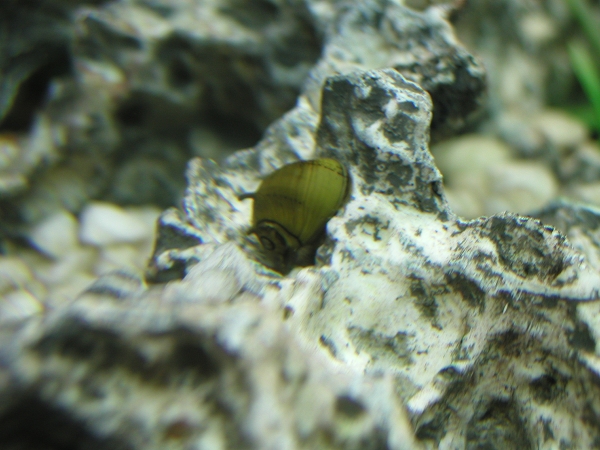
Spiky snail hanging out on some rock.
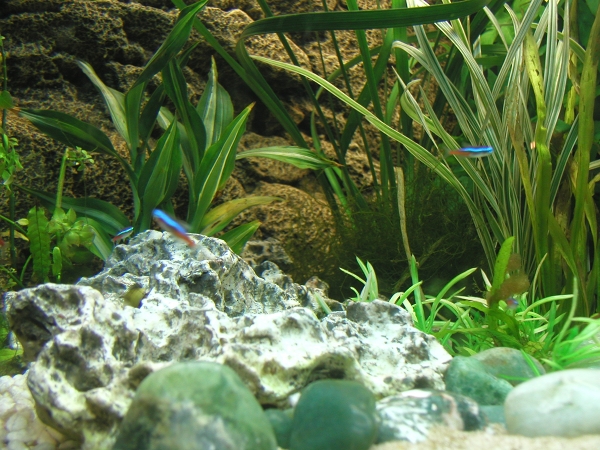
Some of the Neons in amazing blur-o-vision.
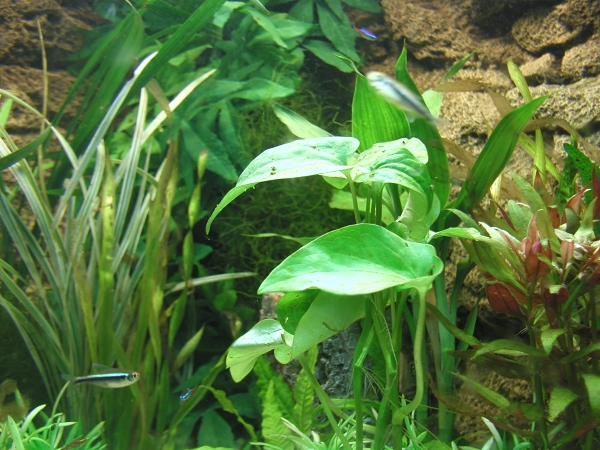
A Black Neon (foreground)
Tuesday 24th November: With the tank cycled to around 3ppm I'm able to add more fish without having to worry about waiting for the biological filter to gradually build up. I don't want to overload it and the ammonia/nitrite levels still need to be monitored for now but I thought I'd take the plunge and get some bigger fish in there so three Mollies have been added this evening. The Khuli Loach were a cause for concern yesterday after one failed to make the headcount all day and I saw one manage to get around and behind the Styrofoam rock background. So much for my attempts to silicon it against the tank glass - looks like there's a slight gap and the loaches have found it! I did see it swim out again but I was concerned one had got stuck behind there. Anyway, I need not have worried as all three are out to play today. I also noticed yesterday that the hordes of tiny snails which were peppering the glass and ornaments before the fish were added have disappeared. The larger snails are still visible but I'm wondering if the loach have been dining out. Like I said earlier, the snail infestation in my last tank disappeared after Khuli Loach were added.
I took a couple of snaps last night to show how the spotlights light the tank for an hour after the lights go out. It looks more impressive than the camera can make out with the LED spotlight beams cutting through the water making striking shadows and rippling effects.
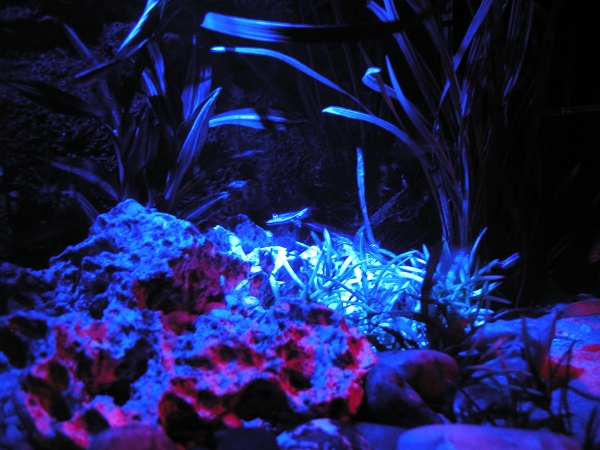
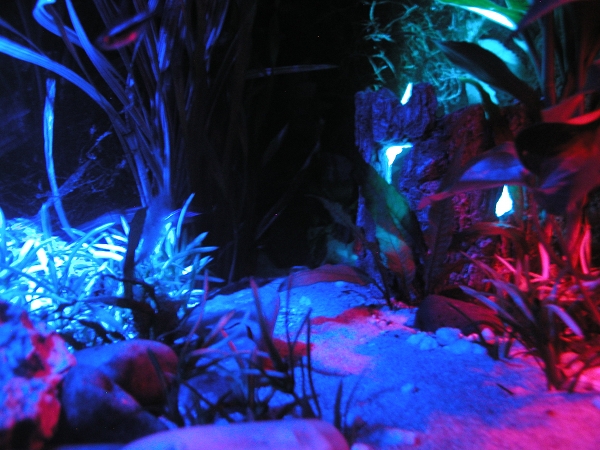
Wednesday 25th November: My existing fish plus the twelve new neons and three khuli loach have been in for 72 hours and the three mollies have been in for 24. Water testing tonight shows ammonia and nitrite are both at zero so the biological filter is coping as I expected. I'll keep testing periodically and won't be adding any more fish for a few days but I anticipate no problems now. The mollies add some extra size and colour to the display but they also have the effect of corralling the tetra into a school which adds a nice movement to the tank. I noticed when the lights went off yesterday that the fish seemed to enjoy bathing in the LED spotlights so I've now set the timer to keep them on throughout the night. There are plenty of secluded dark spots where fish can hide if they want to.
Friday 27th November: Ammonia and nitrite are still zero. Woot! I'm in the process of building a couple of LED lights to place above the bubble flows to illuminate them when they're on. I'm building them in the same way as this previous project except the lights will be above the waterline and shining down instead of being submerged with the air stone. I'm using some white LEDs salvaged from a dead LED bulb as in this project and they're running through a resistor to a USB connector rescued from a duff mouse. These LEDs will run off the same USB hub that powers the existing LED spotlights. Should be able to fit them over the weekend.
Saturday 28th November: Bubble flow LED lights are in and giving the bubble flows some crystal-like sparkle! I haven't yet gotten around to putting the Eheim pump on a timer but I will sort that out tomorrow with it set to come on for a short burst in the morning and evening just for effect. Introduced five new fish today, four male guppies and a Black Swordtail. I have no plans to add any more fish now as there is enough movement and colour in there for it to look interesting. Unfortunately calamity has struck! Shortly after adding the new fish today I found the Fighting fish lying on his side at the bottom of the tank. I was away in London on Thursday and didn't see him much on Friday so I don't know how long he's been under the weather. I quickly netted and isolated him and noticed a discolouration on one side of his body. I dosed him with eSha 2000 which I've had success with before on the couple of occasions where fish have shown signs of disease however there was no luck this time and he was dead within a few hours. I'm pretty gutted as he was a nice specimen and I've had him quite a long time. Of course, I don't know if this is something he had picked up in the last tank, something he caught in the new tank or something brought in with one of the new additions. All other fish seem fine so I'll be hoping this is a one off and will keep an eye on things over the coming weeks.
Tuesday 1st December: Ammonia and nitrite still zero. All fish looking healthy and going about their business. Plants and furnishings also looking good. Probably time to draw this project to a close as the water testing will start to be performed more infrequently. Maintenance now consists of changing the filters at the required intervals plus partial water changes every now and again and removing dead leaves from the plants or waste deposits from the gravel. I might pop back to this page to report any major problems or changes but as it stands, that's all folks!
What's the damage?
As the wife demands to know, just how much did all this flippin' well cost?
|
£425.00 |
Juwel Trigon 190 aquarium Rock background (x2) Aquarium sealant Stress Zyme Air tubing (6m) LED Spotlight (blue) LED Spotlight (red) Gravel Fertilizer substrate (8.6kg) Reflector (x2) Aquarium sand Log ornament Stress Coat dechlorinator Large plastic (Heathers Dream) plant Plastic 'grass' plants White gravel Pebbles Homebase ammonia Ammonia test kit Nitrite test kit |
| £648.89 | Total |
Of course, this doesn't include some of the extra costs - such as the fish! Live plants, food, filter pads and consumables are also not included because they form the ongoing running costs rather than the setup costs. Also missing is the original pricing of the items I already had such as the Eheim pump, some of the furnishings, siphon, algae scraper, test strips, the USB hub that powers the spotlights, etc.
In conclusion then, it was a bit more of a chemistry experiment than I was expecting and some patience is certainly required as the temptation to be damned with the ammonia and start stocking the tank is always there, but when those nasty chemical levels start dropping you know it's been worth it and that you've done the right thing to avoid causing harm or distress to the creatures who will be inhabiting the little aquatic world you've taken the time and expense to create.
Update Thursday 24th December: Ammonia 0, Nitrite 0. I thought I'd post an update on how the last couple of weeks have gone. Firstly, the losses - three neons, one molly and three guppies. The Neons were no real surprise as I find small fish such as these often don't transition well. Although I bought twelve, three were missing in the first couple of days and never showed up again. What was very annoying was the loss of the guppies and molly as most of these showed no symptoms of problems and died very shortly after being added to the tank. Two guppies just didn't make the headcount one day so I removed the lids and searched inside to find both bodies resting on the bottom. The next day a third guppy was floating on the surface and the following day I arrived home to find a molly swimming erratically. I isolated it but it died within hours. With no outward sign of disease, injury or parasite I didn't know what to treat it with other than using some eSha 2000. Whatever killed these fish struck quickly and, for the most part, without warning as all were looking normal a day prior to their demise. All the other fish look fine and at the time of writing there have been no other fatalities over the past two weeks. To be honest I have my suspicions about the retailer I bought these fish from. I won't name them as I have no proof their stock is below par however the fish that died came from there and I've since noticed some dead fish in their tanks which questions their stock keeping conditions. I'm also aware of them advising someone that a Baby Biorb is a suitable tank for Goldfish - which it just isn't! I've since gone out of my way to travel further afield to retailers that appear more concerned with the well-being of the fish than the value of the pound. On a trip to Shirley Aquatics on the A34 I bought four Blue Dwarf Rainbow Tetra which have a nice blue shimmer that is picked up by the tank light and at Coventry Aquatics I purchased two Pearl Gourami. The only change to the tank has been the addition of another blue LED spotlight located at the front centre of the tank above the waterline increasing the night time illumination.
Update Saturday 2nd January 2010: Another fatality GODDAMMIT! Another Molly, same circumstances as before. Looked fine until Wednesday night where it was hanging around at the bottom of the tank. Decided not to isolate this time and dosed the whole tank with eSha 2000 after removing the active carbon from the filter but it was dead by Friday morning. I don't know why my livebearers are popping off like this as all the water tests check out, they're getting a mix of flake, freeze dried and live foods in their diet and aquarium salts have been added to the water as they require. I don't like to use eSha unless I can help it as it contains copper which is bad for the shrimp, although it seems to have brought about no ill effects. The same thing happened with my mollies and guppies in my old tank which used an under gravel filter so I don't know *what* I'm doing wrong. I won't be buying any more livebearers though.
I've made a change to the night time lighting by removing the AquaLED light as it wasn't working out as well as I'd expected. Instead I've rummaged through my spare parts and found the following...
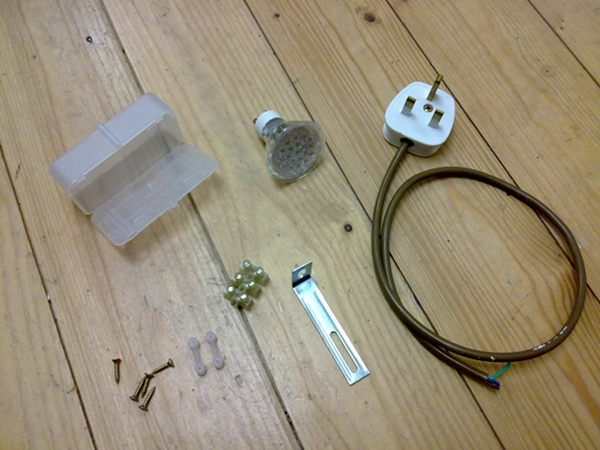
Clockwise from left: ChocBox, LED GU10 lamp, plug & flex from an old lamp, bracket, connector block, cable grip and screws.
Twenty minutes later the above items had been transformed A-Team style into this formidable piece of illumination hardware...
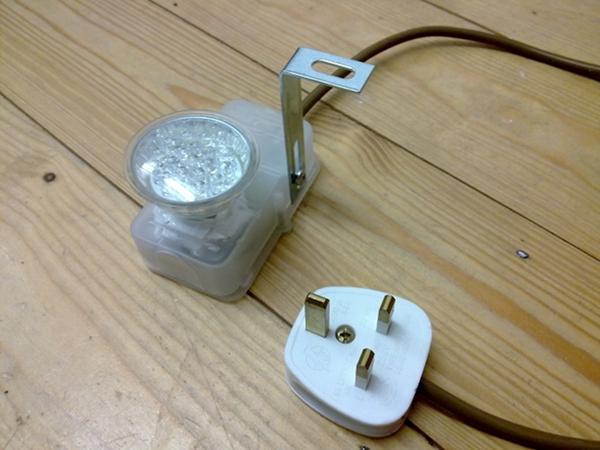
WTF??
And finally it was fitted into the cabinet in place of the AquaLED so the LED bulb was shining up through the cut out made in the base of the cabinet...
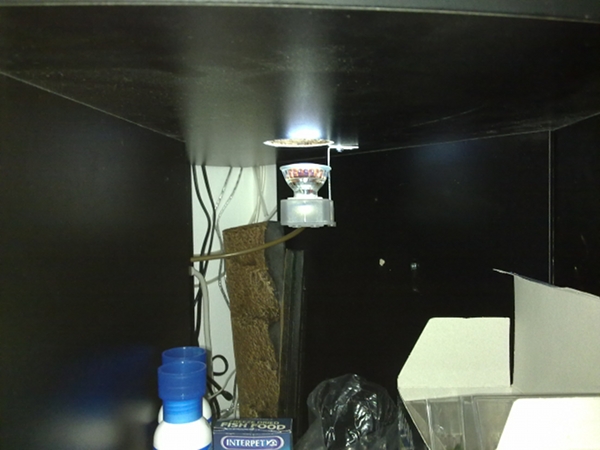
It's on the same timer as the LED spotlights and helps to illuminate the tank at night. The idea is that it will help with the transition when the main tank lights automatically switch on or off so that the fish are less stressed by the sudden change in their lighting conditions.
I've also added a piece of bogwood donated to me by Steve the drunk who, after seeing my tank, went home and drained his four year old Juwel Trigon so that he could copy my 3D backgrounds, undertank lighting hole and bubble flows. The cheeky git also had a good idea for a further bubble flow under the gravel which looks good in his tank and that I may copy myself at a later date!
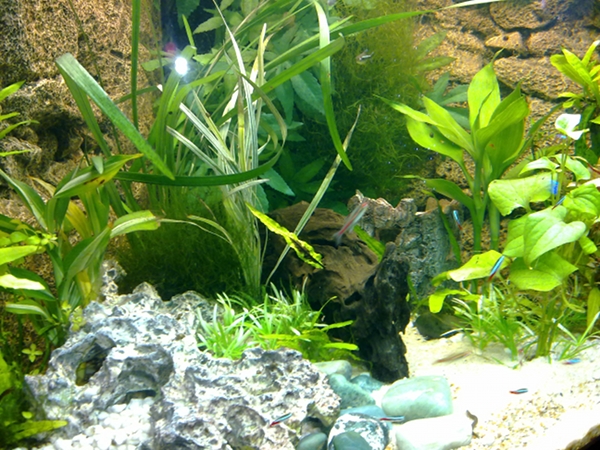
Bogwood, located in the centre in place of some of the plastic plants originally fitted. The Khuli loach like swimming through and around it.
The plants are doing really well and only two have died while the rest are thriving and growing. I never had much luck with plants in the old tank so I'm putting this down to the fertilizer layer and improved tank lighting.
Update Monday 8th February 2010: The remaining Molly and Guppy are dead. Same as before, no symptoms, just a fatality every two weeks until they'd all gone. I now have four of the Pearl Gourami and two little orange Dwarf Gourami. These fellas seem to be doing fine, as are the Tetra, loaches, shrimp and the many snails, some of which now getting quite large. The plants continue to do well, especially the Java Fern which is growing so fast I keep pulling out cuttings to give to other people.
There has been a slight change to the LED lamp I used above in that a colour changing lamp has now been fitted, simply because I needed the white LED bulb for use elsewhere! The colour changing lamp isn't too bad except the blue tends to get a bit washed out. I'm not going to fiddle about any further with the tank lighting however!
Update Sunday 14th March 2010: I took what may be my last trip to my LFS about three weeks ago and made a new and rather daring purchase. I say it may be my last trip because I was shocked at how many dead fish were lying decomposing in many of the tanks. They really need to get their act together and until they do I'll be sticking to Coventry Aquatics and Shirley Aquatics. It's a shame as they have a broader range than these other stores and indeed I found something interesting there that I simply had to have as it looked so cool! It's a figure-8 puffer fish who buzzes around the tank like a bumble bee. I heard it eats snails so I thought it might munch on some of the smaller ones as the tank is now pretty infested with them. Well, it *was*. The puffer started chomping on them as soon as it was introduced. In fact, it ate nearly all the snails including ones which had grown quite large within the first 48 hours. A bit of a shame as I liked having some snails in there and I thought it would only eat the tiny ones as he's not a big fish but he is an eating machine. He took a peck at Spiky but he's too big. Indeed, in the last few weeks, Spiky has grown very much larger and has even adopted a new spike - maybe as a response to his new tank mate. I was very concerned about the puffer taking a bit out of my shrimp but he's massive these days and the puffer ignores him. The introduction of the puffer means a change of diet generally and I'm using more bloodworm than before.
On the fatality front, one of my long lived black neons popped off and I'm down to five blue neons. One Pearl Gourami died and another has disappeared without trace. I've also lost the black swordtail and a Dwarf Gourami. One of the Pearl Gourami is quite large and aggressive towards the others so I don't know if he's behind my Gourami losses. I've decided not to replace the small fish and let the current stock live out their course before maybe stocking the tank with something larger and longer lived.
Algae has started becoming a big problem and in a facepalm moment I realised I hadn't changed the green and blue filter sponges in the last five months even though Juwel say you should change them every 1 - 2 months. The green one is supped to keep nitrite down to control algae and I don't know how this slipped my mind. I rushed out to Coventry Aquatics this week and bought new green, blue and black (carbon) pads to get things back under control.
Bulgarian Brian, my brother-in-law, arrived back in Blighty from a trip to Panama with Hiliary, his (current) partner. They were armed with sea shells scavenged off the beach. There is some debate about whether shells can be used in a tank but I've boiled these up and put them in.
Update, Friday 16 March 2012.
Wow. it's been a couple o' years since I last updated this page! To cut to the chase, the tank is still going and the population has been steady for quite some time. For an update of what's in there and some live pictures (assuming my webcam is working), point yer browser in this direction.
