I can't say I'm a fan of these. I plumped for the PS3 route myself (and I can't say I'm too impressed with that either). These next gen consoles seem to spend more time downloading firmware updates than allowing me to actually play games on them. Still, the 360 doesn't belong to me, it's a faulty unit with the 'red ring of death' that someone asked me and Bolton Dan (bald server man) to take a look at. Amazingly we managed to bodge a repair using a Black and Decker paint stripping heat gun although goodness only knows if it will last.
This guide describes the 24 steps for disassembly followed by the methods we undertook to repair the console. If you're thinking of performing open-Xbox surgery/repair yourself I ask that you please read through the whole article before starting.
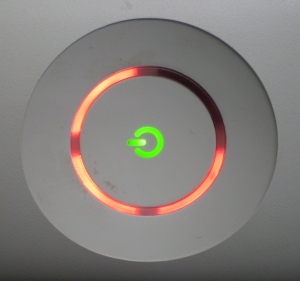
I'm sorry Dave.... I'm afraid I can't do that...
A quick word of warning - taking this thing apart isn't pretty and will invalidate your warranty. If your's ain't broke, then I wouldn't bother reaching for the screwdrivers. If it is kaput, you probably won't find too many user serviceable parts inside and I must admit the repair method we used is a bit 'frigged'. This information is provided as a guide only, you follow the instructions at your own risk.
Tools required:
T8 Torx driver, T10 Torx driver, small flat blade screwdriver, long nose pliers, heat sink grease.
Disassembly.
Step 1. Start with the basics and remove the hard drive and WiFi adaptor (if fitted).
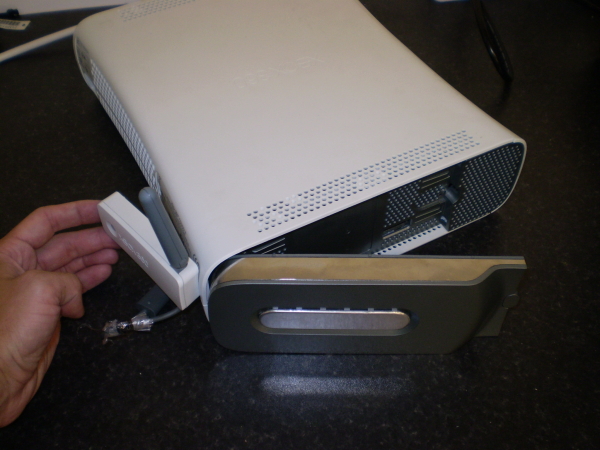
Step 2. The bottom grille is held in place by six grey tabs. Use a small rounded tool (such as a small Torx driver) to gently poke through the vent holes and push the ends of each tab inwards, working around the grille until it is released and can be removed.
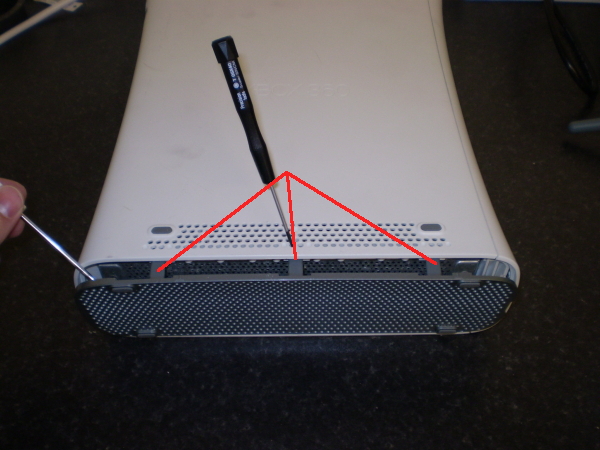
Step 3. Starting from the right side of the unit, prise off the front fascia with a small flat blade screwdriver. Remove the arrowed side clip first and the rest should follow pretty easily. Work around the fascia until it can be removed completely.
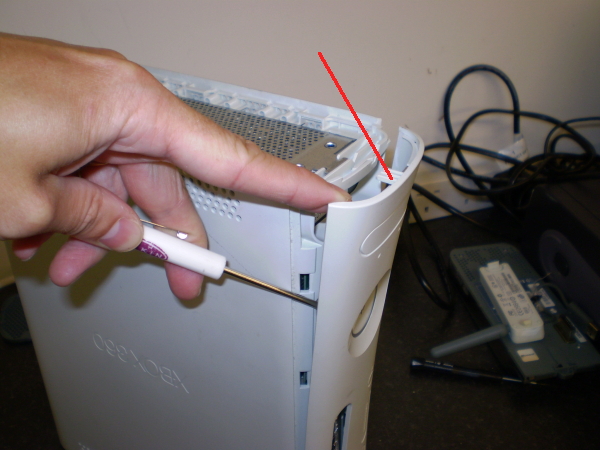
Step 4. To remove the left side vent grille, use a small flat blade screwdriver in the arrowed hole to release the securing clip inside.....
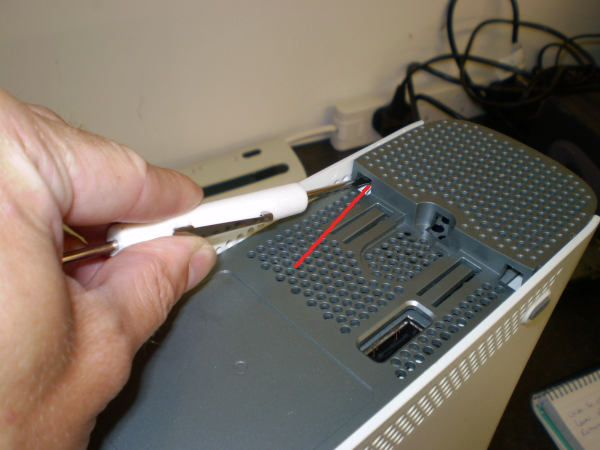
Step 5. ...and repeat with the clip on the adjacent side...
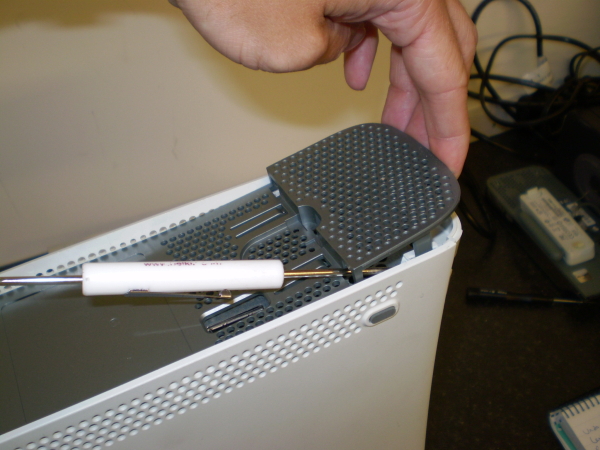
Step 6. ...next release the clips in the centre by gently pushing a small rounded tool through the vent holes...
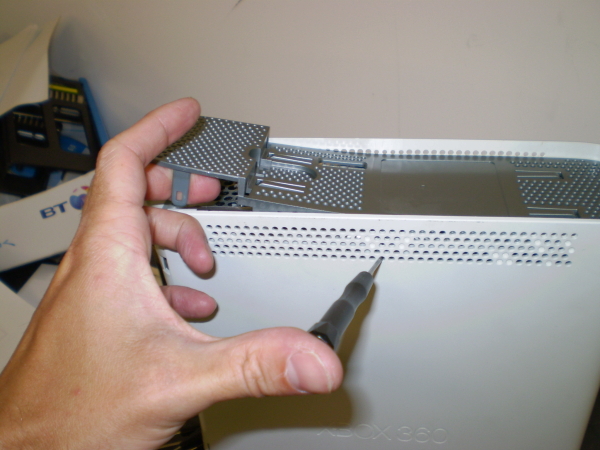
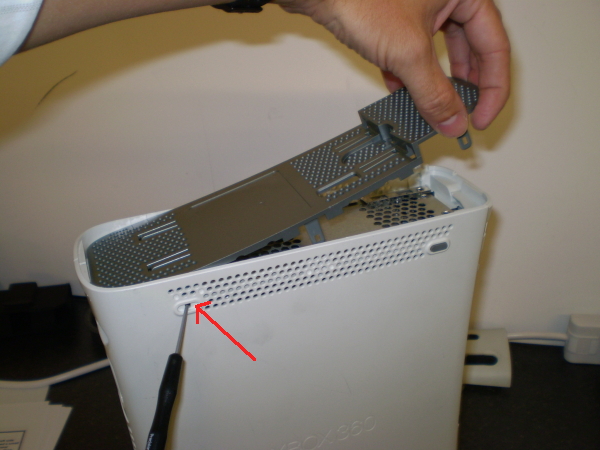
Step 7. ...finally, release the two end clips. You will need to remove the rubber foot from the rear underside (arrowed) and push through the hole underneath to reach one of the clips. The whole side grille should then be lifted away.
Step 8. Bye bye warranty! Peel away the Microsoft sticker from the front of the unit.
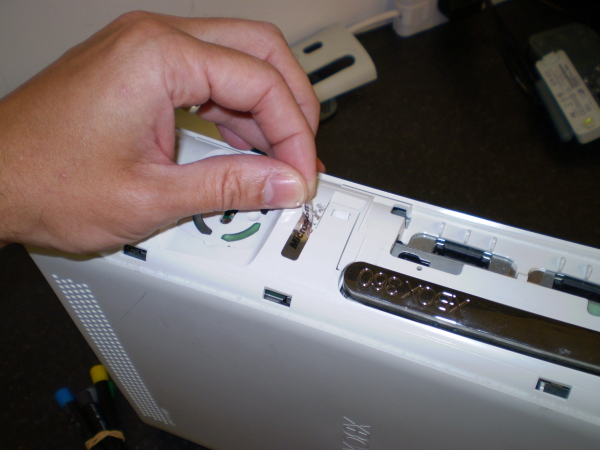
Step 9. Unclip the four buckles on the front side of the unit and prise the two halves slightly apart at the front.
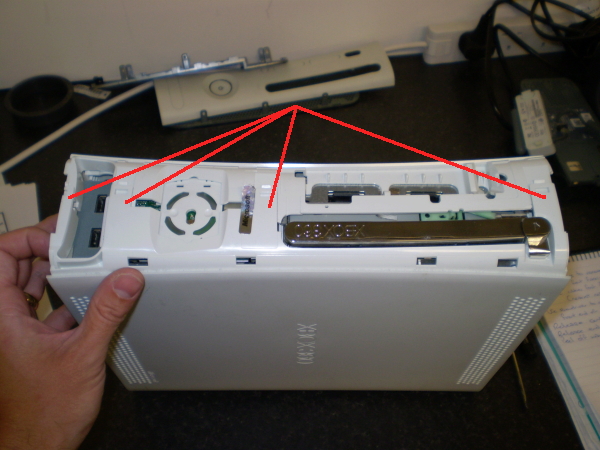
Step 10. There are seven clip release holes on the rear (arrowed)...
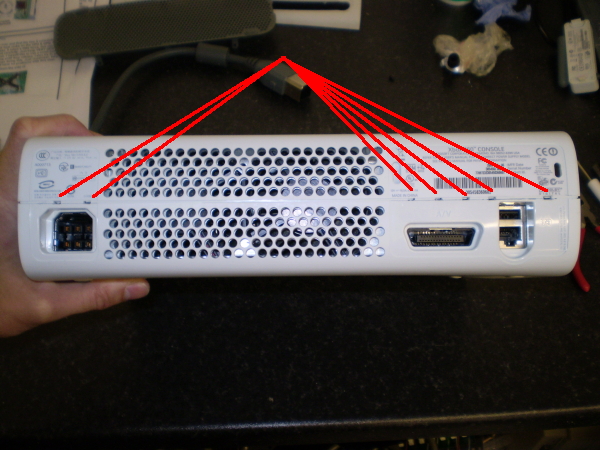
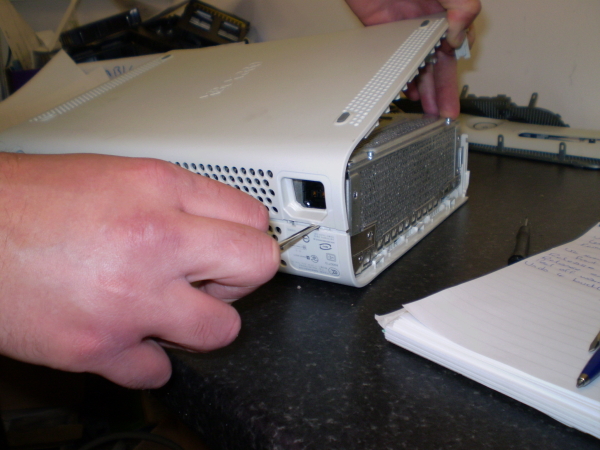
Step 11. ...use a small flat-blade screwdriver to release each clip. With the unit bottom-up, push firmly in and slightly downwards until you hear a click indicating the clip has released. I recommend starting with the two clips on the power socket side. Prise apart the casing more with each released clip. This is pretty tricky and the casing can take some persuasion before finally coming apart. Once the seven clips are released, the bottom panel can be removed.
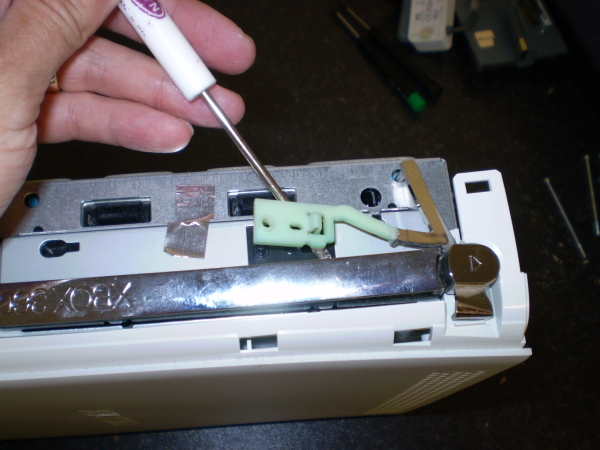
Step 12. Prise the eject button off the DVD drive (snort! My PS3 has Blu-Ray!)
Step 13. Undo the six arrowed T10 Torx screws...
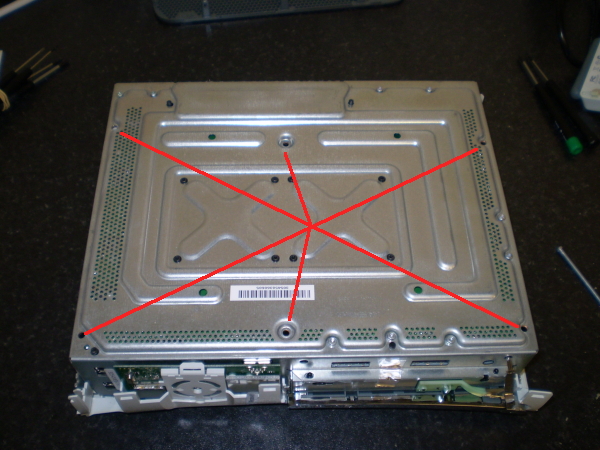
Step 14. ...and lift & remove the internal chassis from the upper casing. The whole of the outer casing should now be removed.
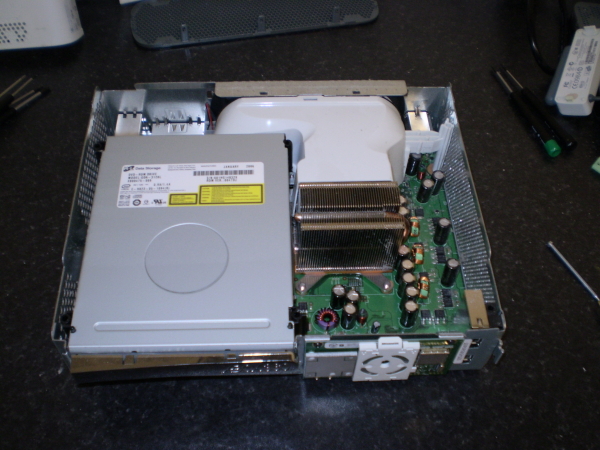
Step 15. To begin removal of the DVD drive (pffftt!!), tear away the metal tape from the front...
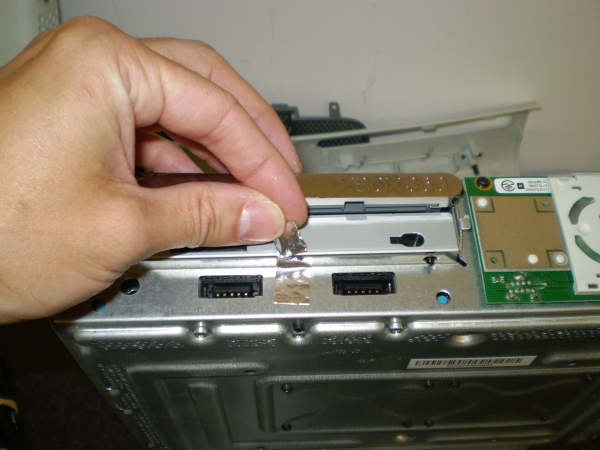
Step 16. ...then lift out the DVD drive and disconnect the power and SATA connectors to remove completely.
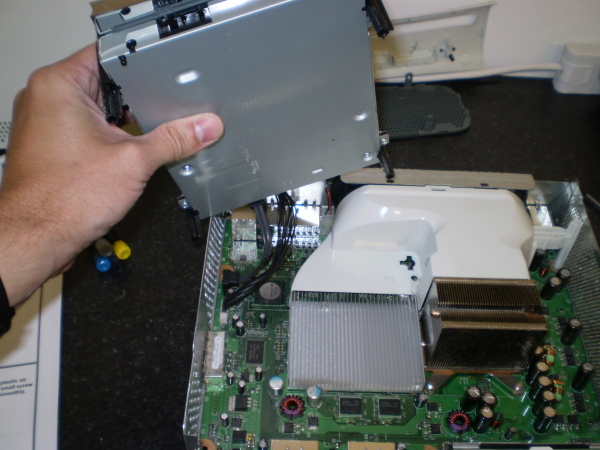
Step 17. Remove the airflow conduit. Prise it up where shown and lift it out.
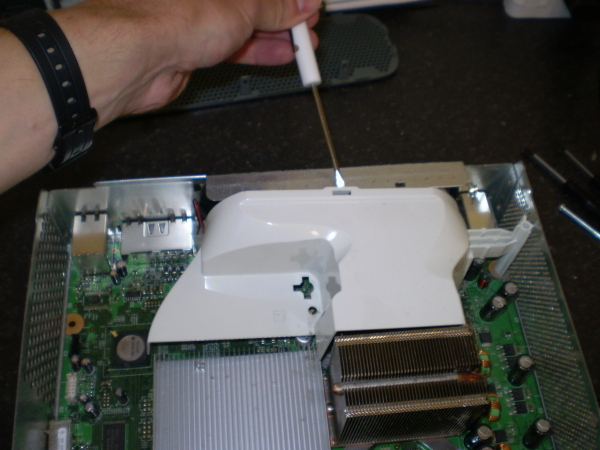
Step 18. Disconnect the power connector to the fans.
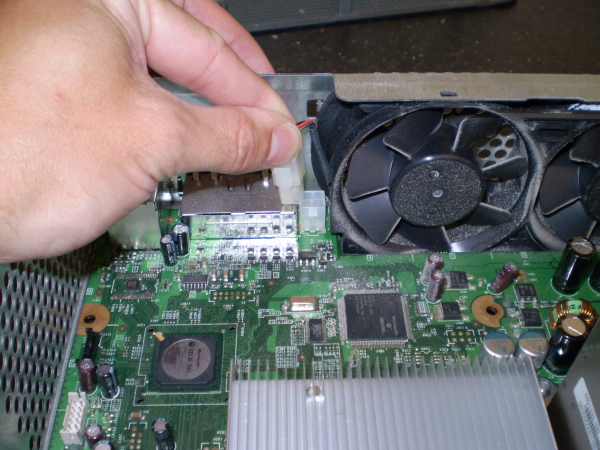
Step 19. Unclip the power button surround from the front panel controller transceiver board.
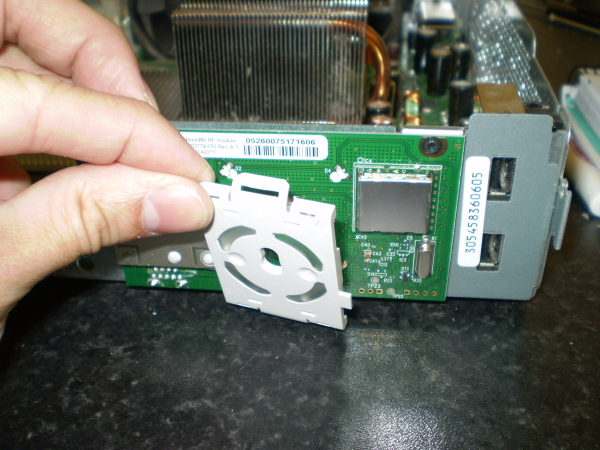
Step 20. Undo the three T8 Torx screws from the front panel controller transceiver board....
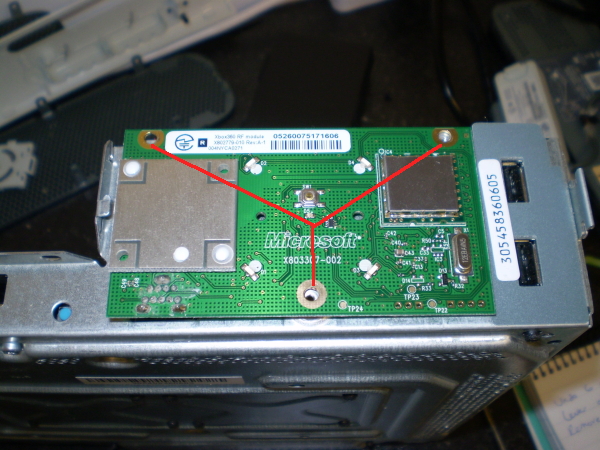
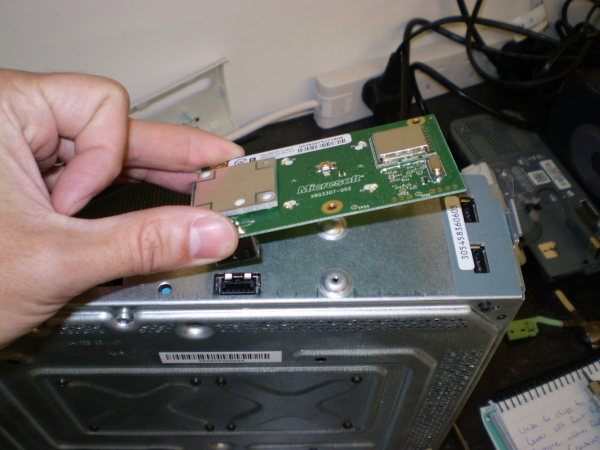
Step 21. ...then unplug and lift away the front panel controller transceiver board.
Step 22. Unscrew the nine silver T10 and eight black T8 Torx screws from the underside...
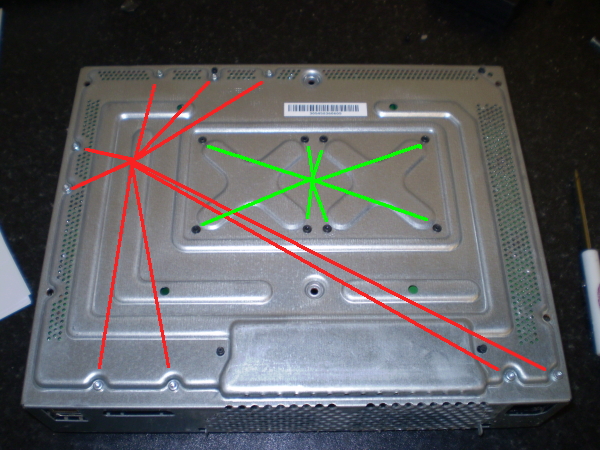
Step 23. ...and lift the motherboard out from the metal chassis (front edge first).
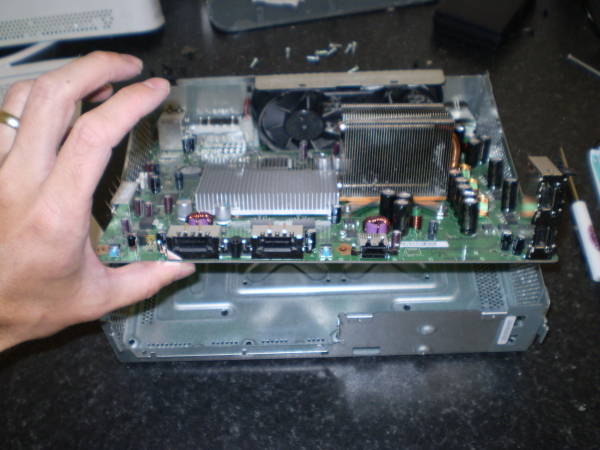
Step 24. The underside of the motherboard is now accessible.

With disassembly complete, this is the repair part. This particular unit is showing the three red lights that indicate a 'hardware failure'. A quick search on the internet shows it's a common problem on this older model of the 360 and general consensus is that it is caused by a lack of cooling. The CPU and GPU heat up when the console is in use and cool down when the console powers off. The solder joints are notoriously poor and, over time, break down because of the temperature variations. The 'fix', such as it is, is to expose the areas of the board under the CPU and GPU to a blast of hot air from a heat gun. This slightly warps the board and the connections are renewed....
... or at least, in our case they were. Trouble is, some people who have used this method report the fix lasts only a short time. We'll just have to wait and see what happens with this one.
If you want to attempt such a repair for yourself, read on....
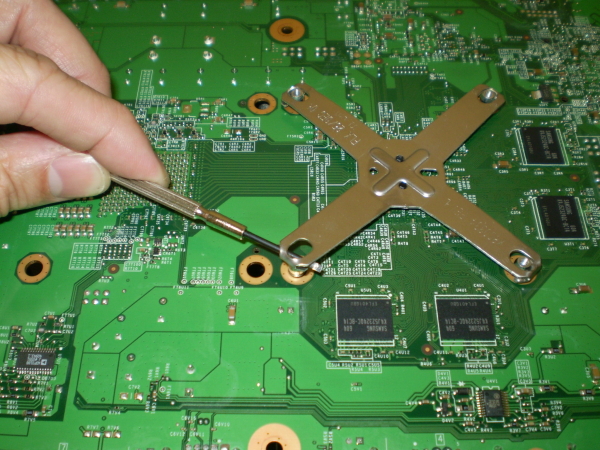
You'll need to remove the heat sinks from the GPU and CPU so release and remove the retaining 'X' brackets from the underside of the board. This can be accomplished with a small flat-blade screwdriver and some snipe nose pliers but care must be taken to avoid causing damage to the board or any components. It's sooooo easy to slip and scrape off a few surface mount resistors! With these brackets removed, the heat sinks are only held on to the chips by the heat sink grease although some gentle persuasion should release the sticky grip of the grease.
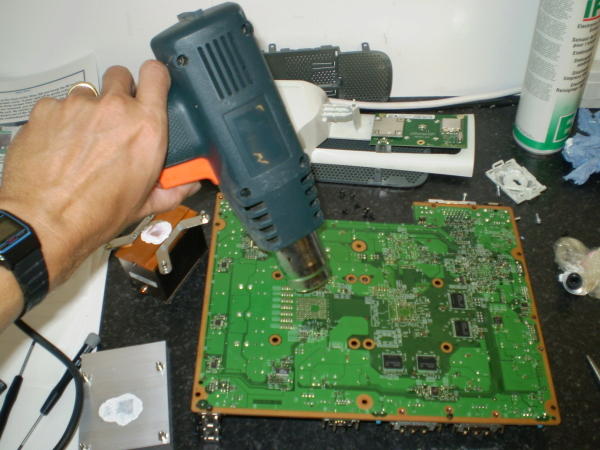
Using the heat gun, heat the board directly behind the CPU and GPU (where the 'X' brackets had been) moving the gun in a circular motion around the general area the processors sit in. Apply a burst of heat for only a few seconds (10-15 per processor in our case). Don't let the gun get too close to the board and keep a careful watch on what you're doing - remember you want to warm the board, not burn it! Do the same on the chip side of the board again heating the general processor area directly but only for around 5 seconds per processor.
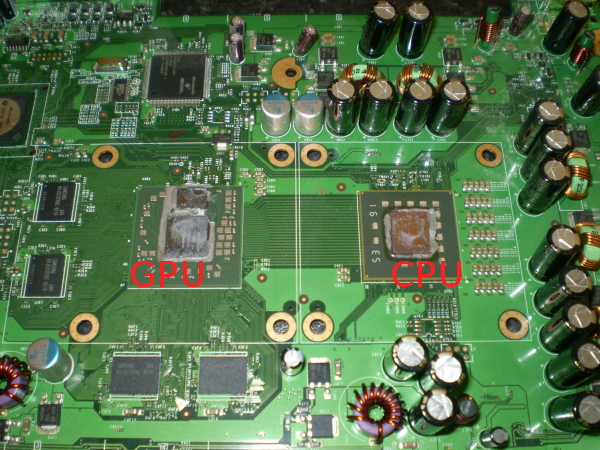
The picture below shows the GPU and CPU with the heat sinks removed. In our unit there seemed to be very little of the original heat sink grease left. When refitting the heat sinks for reassembly, the old grease should be cleaned off both the processor dies and the heat sinks. We used a special cleaning alcohol to clean ours. New heat sink grease should then be applied to the processor dies before the heat sinks are refitted.
And that's about it. Reassembly is the reverse of disassembly. Just be sure those heasinks are firmly attached with new grease applied!
Before fully reassembling, you may want to get it back to how it looked in Step 14 and power it up to test. If still not working, perhaps reapply the heat method or investigate further. Remember you will need an AV cable plugged in or all four lights will flash red so hook it up to a TV as part of the test and hopefully your ring will turn green!
